|
This has been a fairly intensive painting session and now I need to let these
layers of paint cure for a day before continuing. Next I’ll be masking off the
upper pattern and shooting the light gray underside. There are a few minor areas
that will need touching up with a brush and then the final pieces will be added
to the model.
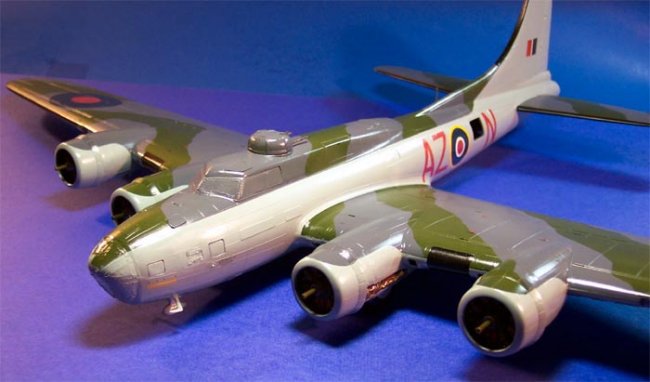
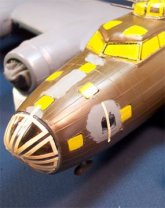
Now I have some more serious masking to deal with. I’m using a very basic,
generic type of masking tape that I buy in bulk from my local automotive paint
store – this is Highland tape part #2727 and is a medium tack tape. For each
of the engine cowlings I use a quarter as my former and cut out a circle of tape
to center on the cowling. Then I use thin strips of tape to cover all of the
edge lines. The wings and stabilizers are covered with tissue paper and any
other exposed area is covered with more tape. The entire underside, the fuselage
sides and the rudder and fin are shot with Polly Scale light gray. The dark
green and dark sea gray were both Polly Scale also and gave me no trouble
painting but the light gray is very difficult. It wants to clump up and clog the
airbrush repeatedly. I thin it out to about 50% with Windex and add several
drops of flow aid and this solves the problem.
| With the paint thinned out to this degree I have to apply several light coats to
get good color density allowing about a half an hour between coats. Once this
has been completed I remove all the large masks and the deicer boot masks as
well as the masks over the waist gun positions. The masks on the clear parts
stay in place but the tissue packing from the engines and landing gear are
removed at this time also. The light gray did crawl under the masks in a few
placed but this is touched up with a wide soft brush and I am ready to move on
to the main gear. |
Click on
image below to see larger image
|
 |
|
| A good sized drop of medium super-glue is placed on the end of the landing gear
leg and another is placed on the contact side of the axel where it will connect
onto the bay bulkhead and then the gear is put in place. I’ve cut short pieces
of Evergreen rod, painted them steel and now super-glue them in place as the
visible part of the retraction arm. The superchargers are painted with Polly
Scale rust, washed with a black sludge wash then dry brushed with Gunze-Sangyo
Burnt Iron to give them a metallic sheen. |
Click on
image below to see larger image
|
 |
|
In each wing leading edge there is a small bay for a landing light and there is
a large gap inside each bay that I’ve filled with Squadron White putty. This
gets trimmed up with a razor knife and some sandpaper before getting a coat of
Testors silver paint. The light itself will be made from some scrap plastic and
the lenses will be installed after the final dull coat has been applied.
The tail wheel has been super-glued in place and the strut brace has been
trimmed for a folded position and installed in the tail wheel bay also. The
canvas cover around the tail gun position has been done in a rust color to
simulate leather. I’ve gone over the entire model looking for defects in paint
or surface that need touch-up and feel it is fairly complete. The model is given
overnight for all paint to cure and then she gets a good coat of Future.
|
Once again there is an overnight drying period and I can begin to apply decals.
One thing I can say about those old Revell decals is that they give you lots of
little stencils. I’m using those from the kit sheet as well as a few from an
old Aero Master B-17 sheet and the national markings are coming from Aero
Master, Lancaster Bombers Part 2. The national markings are put down first and
then the other decals will be applied after those have dried. The markings on
the fuselage are actually three decals layered and I like to give each layer a
day to dry before putting another on it so I have three days tied up decaling.
|
Click on
image below to see larger image
|
 |
|
Before each decal is placed I use a soft brush to dampen the area with some
Micro-Set solution. After each decal has been in place for about five minutes I
come back with the soft brush and Micro-Sol to treat the decal. The old Revell
decals are pretty brittle and the edges want to curl up as they dry until the
Micro-Sol hits them and then they settle down nicely. The large Aero Master
roundels on the wings gave me a bit of trouble also. They are single layer
decals but do not want to conform to the wing surface. I had to hit them three
times with Micro-Sol to get a good result. The other Aero Master decals behaved
just fine.
She’s starting to look really nice, I can hardly wait for
the masks to come off.
The weathering process has begun and I'm experimenting with different methods of
accenting raised panel lines. I tried some standard sludge wash but that did not
take very well. I tried some work with a sanding stick to abrade off the top
layers of paint and expose the darker plastic underneath but that was a lot of
work and I didn't really like the results. Next I tried a .005 Micron archival
pen to trace the raised lines but that created a very stark look that I didn't
like either. Then I went back to the sludge wash idea and tweaked it with some
Higgins brown ink and Liquitex flow aid and ended up with a result that I could
live with. I probably should have gone for a different color ink as this one
went a little red on me and that was even after I added some Grumbacher Black
and Sienna to it.
| The wash mixture that I’m using is mixed in a soda pop bottle top and consists
of a small dab of Grumbacher Black + a small dab of Grumbacher Sienna + a few
drops of Higgins dark brown water soluble ink + a few drops of Liquitex flow aid
+ a single drop of liquid dish soap and lots of water. I brush the mixture onto
the raised panel line and let it dry then, using a good quality paper towel cut
into about four inch sections and folded into tight pads and dampened ever so
slightly, I wipe the model surface from front to back. This take a little
practice to get just right as some area need just a light touch while others
actually need some scrubbing to get the ink level just right. The fueling caps
were streaked by placing a drop of wash on the cap, letting it dry then slightly
dampening my fingertip, placing it firmly on the spot and giving it a quick wipe
to the rear. |
Click on
image below to see larger image
|
 |
|
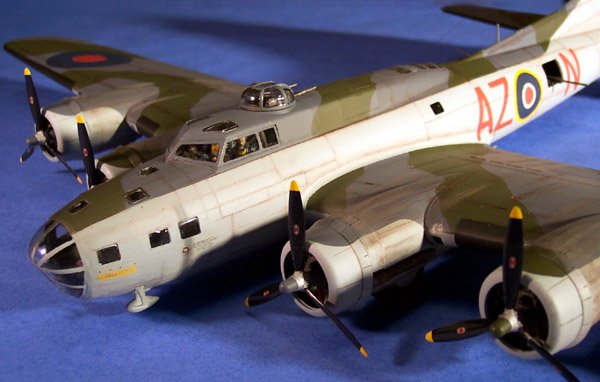
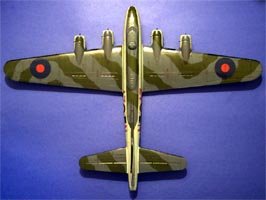
Now I shall work on some exhaust staining. First point if interest is the vents
on the upper surface of the wing. Many times modelers will show heavy staining
around these vents but they are vents not exhaust ports. They
vent hot air from the oil coolers and intercoolers.
With this in
mind I keep a very light residue track from these (we are talking oil here) and
make heavier tracks on the bottom of the wings. The staining is done with Tamiya
X-19 smoke thinned 20% with Liquitex flow aid added. My air pressure is set at
about 7 psi and I am making several light passes to build up some color. This is
only the base layer of the stain. Once this layer has dried the entire model
gets shot with Polly Scale clear flat then the pastel chalks come out.
I’m using a combination of brown
and light gray pastel chalk. I use my razor knife to shave it into a pop bottle
cap and mix about 70% brown and 30% gray. Using a cotton swab I wipe the ground
chalk onto the model creating the final stains. Just like with the airbrush,
repeated passes increase the color density. Using a short brush I dry dab some
steel onto leading edge surfaces for some light paint chipping. Once this is
complete I cut a small piece of clear plastic from a battery bubble pack for the
rear crew door window and install that. The aerial is made from some invisible
thread drawn across the tip of a black marker and secured with some super-glue.
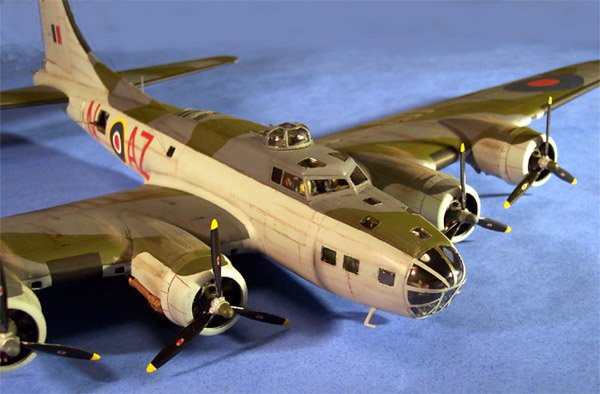
The final pieces are added now; the waist guns are positioned with small dabs of
super-glue and the tail gun is mounted. The propellers are all placed with some
Tenex 7R and now the masks come off. I used Fast Frames masks and will never use
them again. These things are very difficult to get off and, at first, I thought
they were leaving behind all their glue but it turned out they were ripping off
the Future coating. I had to go back over every clear part that had a Fast
Frames mask on it and re-Future it. All areas that were masked with liquid
frisket and masking tape came clean without a problem. From now on it’s Black
Magic masks for me.
Matt
|