|
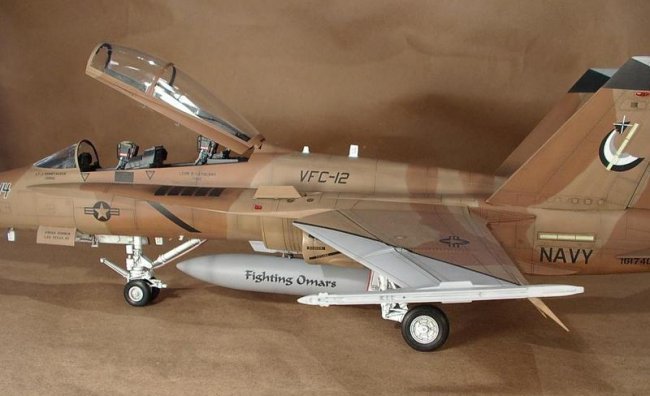
Hello. This is my second
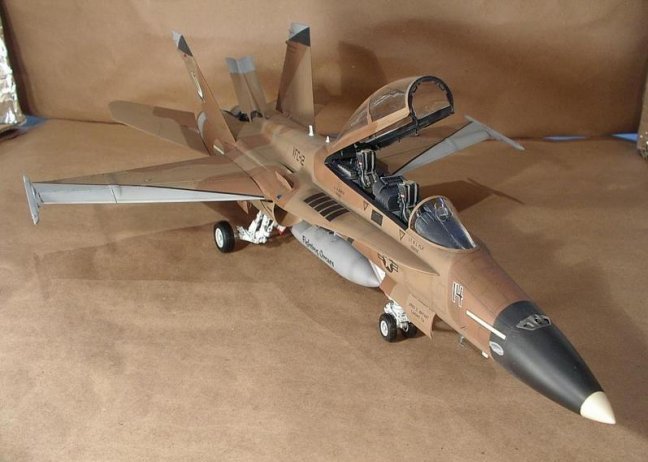
submission to ARC and it's another big one - the Academy 1/32 Hornet.
This is the 2-seater version that is sold as the "D" night
attack model, but there are enough extra parts in the kit to back-date to a
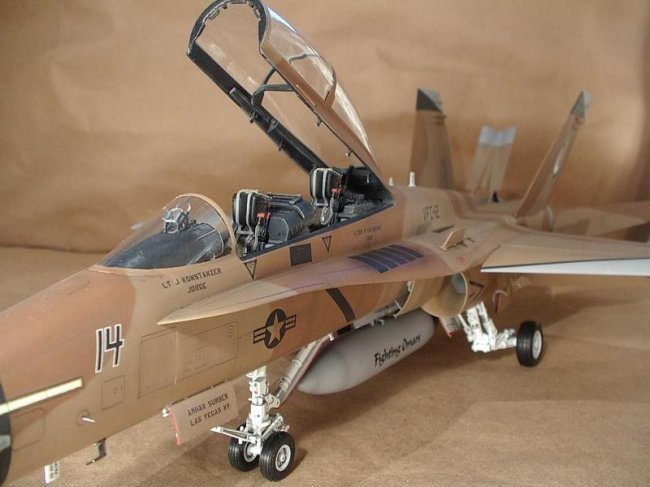
"B". I decided to use this kit to build an Aggressor Hornet in
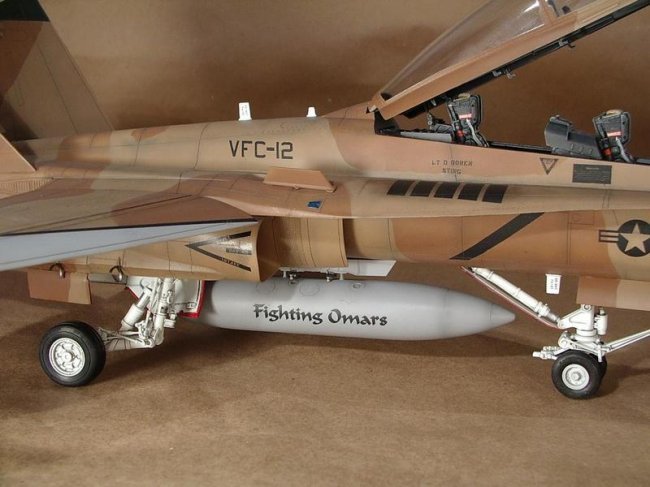
the desert camouflage for the VFC-12 Fighting Omars.
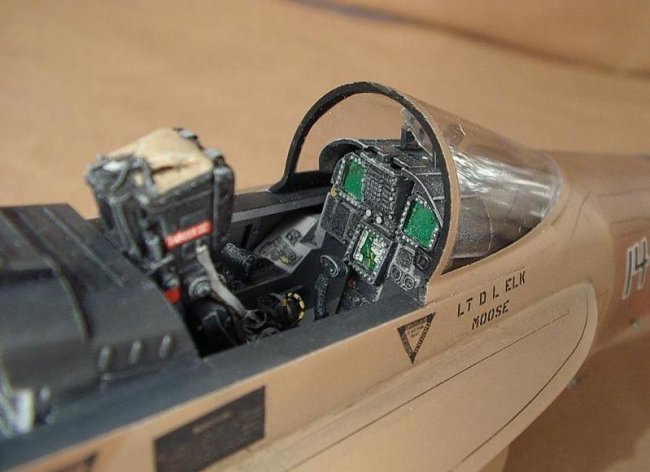
As you may or may not know, the
kit comes with a highly detailed cockpit out of the box. I contemplated
using an aftermarket cockpit set that might offer marginally more detail.
However I figured since I built 3 straight models prior to this one using
BlackBox's offering, I should spare myself the torture this time. I
actually settled on a hybrid cockpit - The tub, sidewalls and instrument panel
are all stock, the ejection seats are from Cutting Edge.
When building the "B",
be careful to use the right parts for the cockpit. I think I used all
the right parts but I know tomorrow my inbox will be flooded with correction
notes from you Hornet experts out there. What I did NOT use correctly
was the part for the under-nose panel with the wrong vents. Oh well.
Click on
images below to see larger images
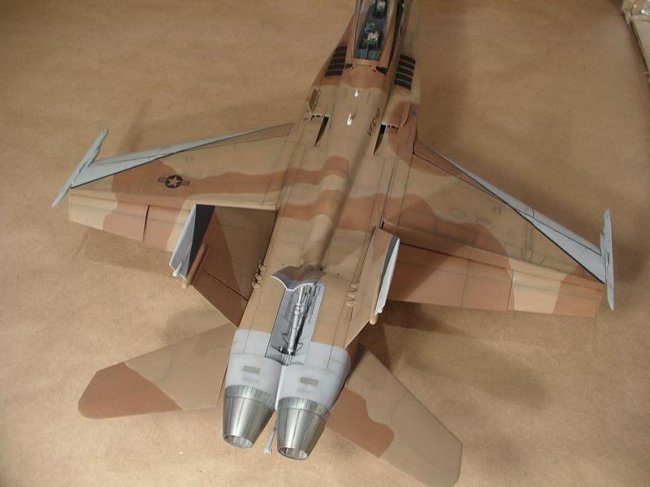
The intake trunk presents a challenge:
an inside seam that will test any modeler's patience. I used Testor red
tube glue to put the trunk halves together, squeezing them to let the glue
fill the seam. After it cured, I used sanding sticks to meticuloulsy
sand it smooth. The end result wasn't perfect - the guys at Seamless
Suckers won't lose any sleep over my paltry effort - but was good enough to
cover 90% of the unsightly gap.
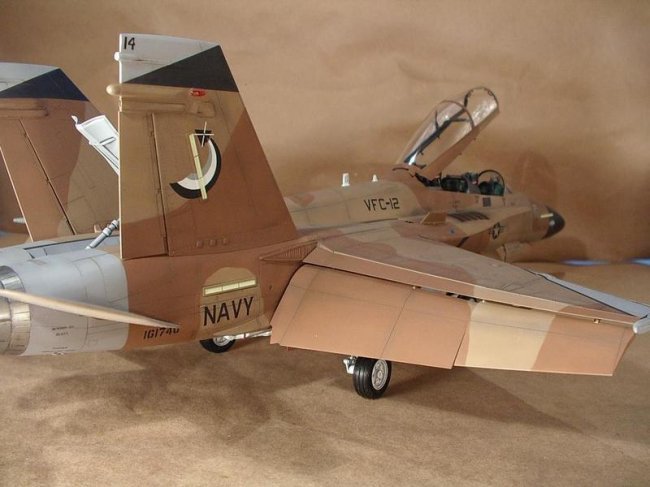
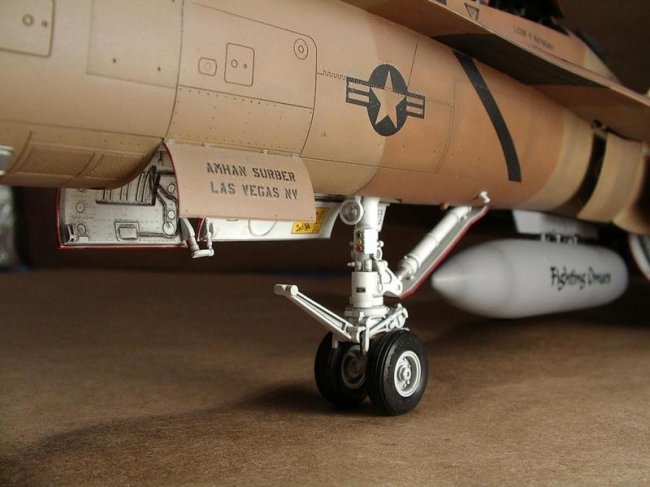
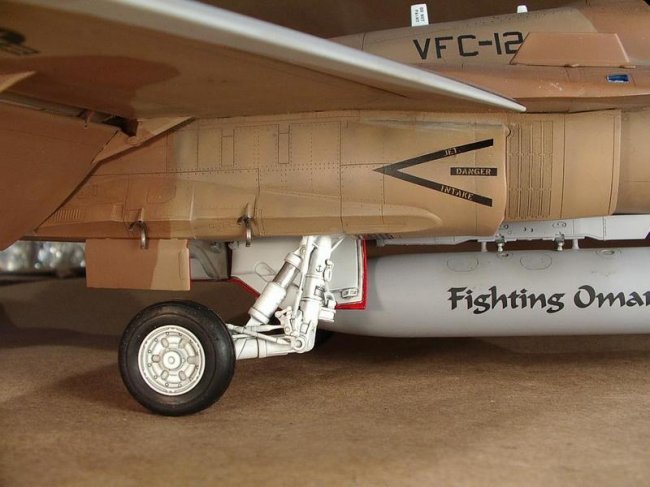
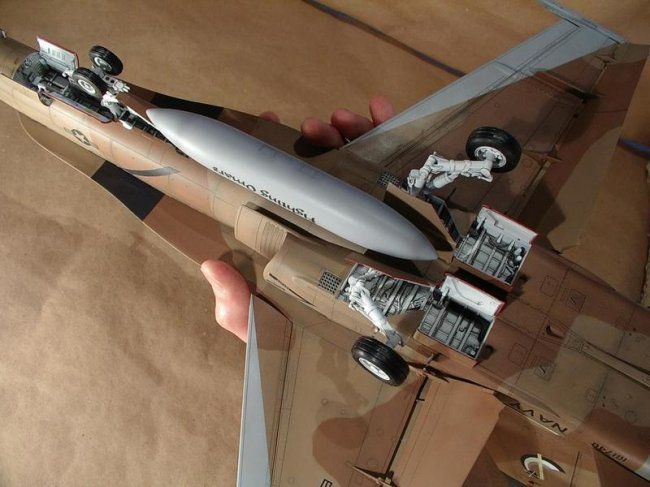
The most challenging part of the
construction has to be the main landing gears. They're highly complex
and consist of so many tiny parts that they have "lose me" written
all over them. In fact, I almost lost a couple of them to the Carpet
Monster. I should write an ARC article "How To Slay the Carpet
Monster" - get on all 4's and slap hard against the carpet, the vibration
will make the lost part jump.
All the landing gears and cockpit
parts were painted with Gunze acrylics which is my paint of choice.
I primed the
airframe with Mr. Surfacer 1000. This was somewhat of a mistake because
the pre-shading and camouflage were to be done with Model Master enamel, which
refused to stick to this lacquer-based primer. There were so many
scratches and paint chips on the camouflage it'd make a Zero fighter blush.
Multiple touch-up sessions ensued. The chipping finally stopped after I
coated it with Future.
The decals came from
Twobobs, which silvered like they were on a mission and did not react well to
setting solution. I know it's probably my fault for not having a
flawlessly smooth Future'd surface for decaling so please spare my inbox the
pain of explosion. To alleviate the silvering, I had to pinch the decals
with a needle then flood them with setting solution - ironic because I was
trying so hard to not scratch the paint before.
The decal'd model
was flat coated with Gunze acrylics and given a burnt umber wash.
Weathering was done with pastel chalk and was kept to a minimum for this
land-based Navy jet.
The finished model
is big and impressive. It has enough dings on it to stop it from becoming
a contest winner, but I'm still very happy with the results. If/when I
build another 1/32 Hornet, I will do it in the CF-18 tiger stripes markings.
Terry
Click on
images below to see larger images
|