|
The
F-4U Corsair family does not need to be introduced to anybody with the slightest
interest in aviation. Most would know about the bent wing aircraft, thanks to
the famous "Ba, Ba, Baa Black sheep" TV series starring Robert Conrad
as Papy Boyington.
The
Tamiya models of the F-4U1 Corsairs easily are the best start to build an early
Corsair. They have been released both in 1/48th scale and in the smaller 1/72nd
scale. These kits are simple, accurate, sharp and easy to build. Several sub
versions have been released by Tamiya in the bigger 1/48th scale (F-4U1
Birdcage, F-4U1A, F-4U1D), but to the date only the later F-4U1D has been
released in the 1/72nd scale. Other versions would be easy options for Tamiya
but they have not made the step yet to release them.
After
I altered the Academy model to an F-4U1 Birdcage and an F-4U1D (see article ARC
page)
http://www.arcair/Fea1/301-400/Fea322_Corsair_Bade/Fea322.htm
I
now wanted an F-4U1A in the mid war three colour camouflage and this time, my
starting point had to be the Tamiya offering.
|
Click on
images below to see larger images
|
|

|
 |
|
The
model
This
kit is a little wonder. It is well detailed, accurate, plastic is sharp and well
engineered, yet the kit is simple with relatively few parts. It clearly is a
down sizing of it's 1/48th big brother and as such it was produced with the
possibility to derive different versions. Tamiya has not released any other
boxing yet but conversion to the A subversion is extremely easy.
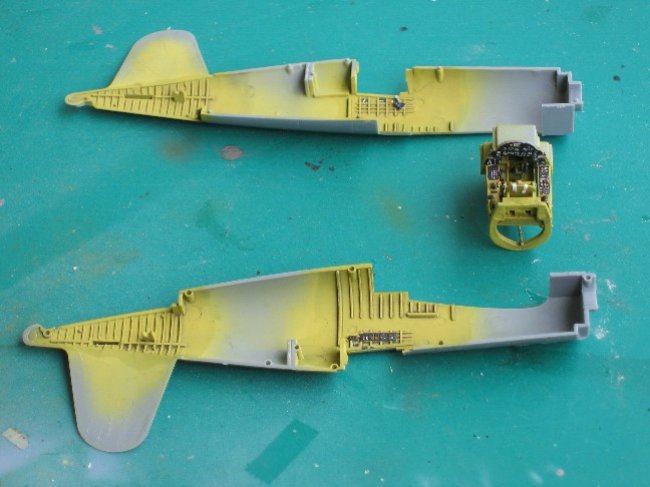
Building
Building
starts with the cockpit and this model needs no aftermarket item be it resin or
PE. Out of the Box is the name of the game. Yellow zinc chromate was used
overall with black on consoles and instrument panel. I just added one or two
bits of plastic card. Instruments are instrument decals from my spare decals
box. They were punched in shape using my Waldron sub miniature punch and tie
set.
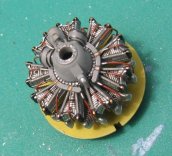
Next
sub assembly is the small PW R2800 engine. It is very sharp as is and I just
added a few lines from thin fuse wire. The rest was a matter of paint job.
Overall colour is aluminium, with a medium grey crank case, black details and an
oily finish achieved with a wash of Tamiya Smoke (black translucent paint)
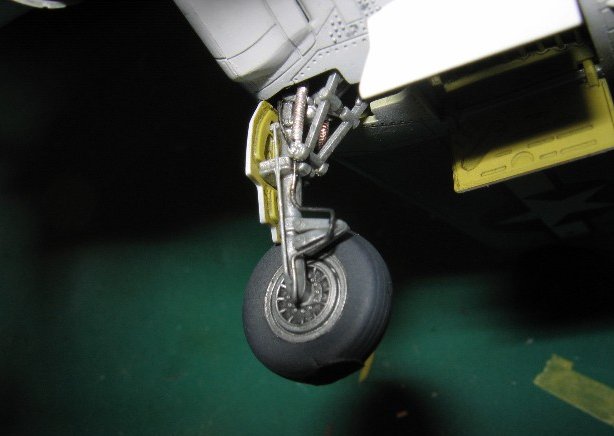
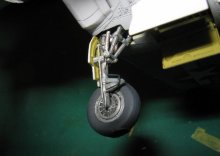
I
then detailed landing gears. Main gears received small springs that I made from
very thin electric wire. Brake lines were added. Tail gear was detailed. I added
a tie down ring. I also shortened the tail gear to depict an early F-4U1A.
From
this point construction was very straightforward. There are relatively few parts
and all adjustments are perfect. The one area I modified was the recess area for
canopy adjustment behind the pilot head. This recess is present on most Corsair
models, to allow fitting of the canopy in closed position, but my documentation
indicates there was no such thing on real machines. Il filled this recess with
putty.
Painting
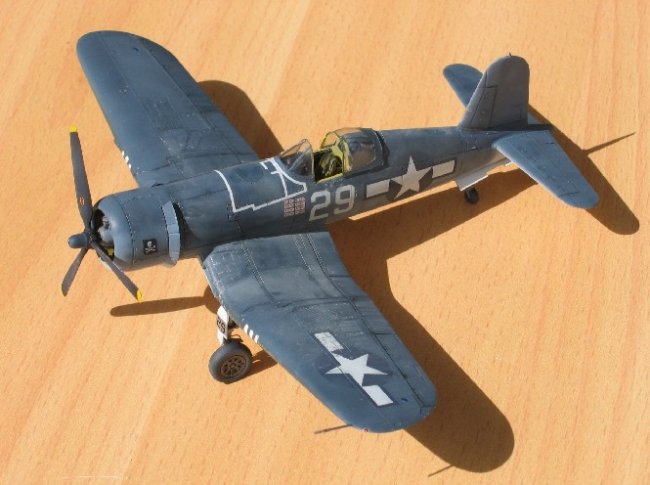
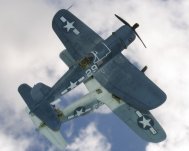
As
I wanted to build a three tone camouflaged F-4U1A, I had to buy an after market
decal sheet as box includes stickers for two overall sea blue F-4U1D. Choice was
wide as nearly every decal manufacturer released decals for Corsairs but I
elected nr 29, the aircraft of capt Ira Kepford. I was happy to find photos of
the real machine that confirmed some details (no radio masts, short tail landing
gear equipped with its tail hook). I used Gunze paints for this project and the
three camo colours were easy to find.
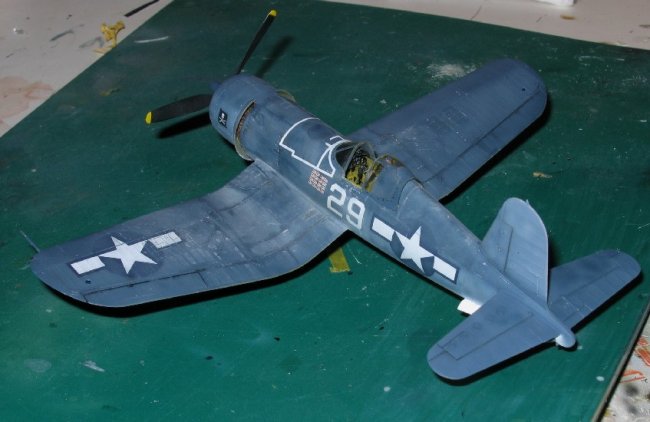
As
I wanted to depict an operational machine, colours were altered so as to blend
them somewhat, as they were under operational conditions prevailing under the
warm Pacific sun.
White
was used as is, medium blue was mixed with white, sea blue was mixed with medium
blue. That is for base camouflage colours. I then sprayed spots of different
hues of these basic colours to achieve a blotchy aspect.
Decals
are from the Eagle Strike range and they adhere very well. I used Microsol and
Microset combination to good affect, just to be sure my decals would conform to
the small model and to avoid silvering. This stage went quite fast as there were
relatively few stickers.
|
Click on
images below to see larger images
|
|

|
|

|
Finishing
Next
step was weathering. I wanted a model with an operational look. I therefore
added small spots of silver paint to depict chipping of paint. I then went on
with enhancing panel lines with a wash of Sepia oil paint. Once this was done I
sprayed some light coats of matt varnish. Final operation was using sand
coloured powder over the airframe, insisting on wings where pilots and mechanics
would walk.
Completing
this model allows me to add another Corsair to my collection. The Tamiya model
is a very nice model indeed and a pleasure to build. Now I would like Tamiya to
release a Birdcage Corsair from the same tooling.
Just
in order to complete my wish list let all know that we need an F-4U4 in 1/72nd
scale.
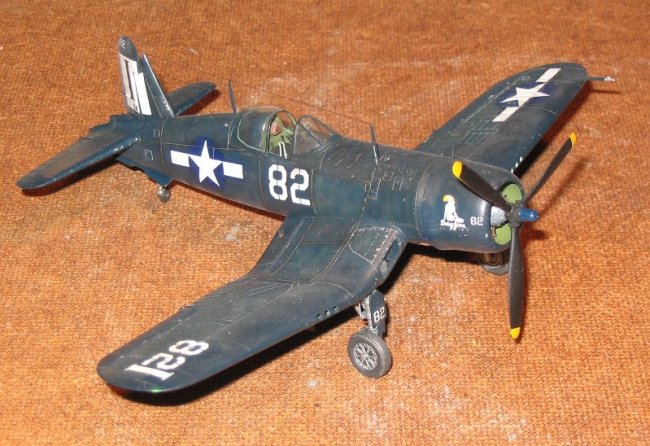
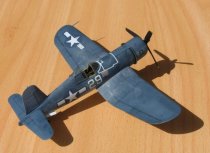
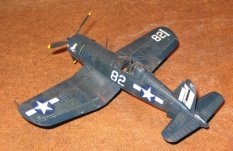
I
also enclose photographs of the Academy F-4U1D (#82 that appeared in my previous
feature on ARC). I also wanted a model with a more operational look so I took it
from the shelves to receive a new application of weathering.
Eric
|
Click on
images below to see larger images
|
|
|
|

|
|