|
History:
Development of
the DC-9 began on April 8, 1963. The DC-9 first flew on February 25,
1965, and commercial service began in May that year. Variations of the DC-9
began rapidly appearing with sub-designations, like the DC-9-40. So many
stretches were made, that by 1977 it became a whole new generation of
aircraft. The first new-generation twin jet was labeled the DC-9-80.
The origins of the newly dubbed MD-80 lie in 1975 testing of the DC-9
with new improved, more efficient, higher bypass ratio JT8D-200 series
turbofans. McDonnell - Douglas originally proposed to fit these engines on a
development designated DC-9-55. Instead, the company developed the DC-9 Super
80, combining the new engines, a much longer stretched fuselage, increased
wingspan, and other improvements. The first Super 80 was launched in October
1977, and first flew just two years later on October 8, 1979. The first
customer delivery was to Swissair in September 1980. In 1983, McDonnell -
Douglas officially renamed the DC-9-80 to the MD-80. The MD-80 is actually a
designation for the 4 aircraft in the series. These were the initial MD-81,
the more powerful MD-82 with JT8D-217 engines, the extended range MD-83 with
more fuel capacity and more powerful JT8D-219 engines, and the MD-88 with the
same JT8D-219 engines, but with a new EFIS flightdeck, and redesigned cabin
interior. After the 1997 merger of Boeing and McDonnell - Douglas, Boeing
decided to drop the MD-80 program until current orders were completed. The
MD-80 remained in production until January 2000.
Alitalia
was formed almost 60 years ago, back in 1946, as one of the airlines supported
by the Italian government after WW2. The company began operation in May 1947
with the help of British European Airways. In 1957 it merged with Linee Aeree
Italiane, because they both operated many of the same routes. Alitalia began to
fly with several new aircraft, including the DC-3, DC-6, DC-7 and the
Convair 440. The airline was introduced to the jet age with the Vickers
Viscount in 1960, and the first pure jet, the DC-8. In the 1980s, the MD-82
joined the fleet, and by 1998 Alitalia had 95 MD-80 aircraft. The airline
currently has a fleet of 193 aircraft, including the ATR 42, ATR 72,
Embraer 145LR, Embraer 170, A319, A320, A321, MD-80, Boeing 767-300ER, Boeing 777-200,
and MD-11.
The Kit:
This kit was
fairly new when I bought it, so when I opened it up, I got much more from
Minicraft than I expected. The plastic was much better than other
Minicraft models, and there was much more detail, because of all the panel
lines on the wings, and even the fuselage. The kit comes with the normal
fuselage sections, a choice of 2 tail cones, an interlocking wing system, detailed
engines, and really small landing gear. Even the decals are printed really
well, which can be seen right away.
|
Click on
images below to see larger images
|
|

|
 |

|
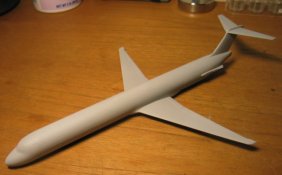
Construction:
I began
construction by putting together the two fuselage halves. I put in several
lead weights in the nose, since there is a lot of weight in the back of the
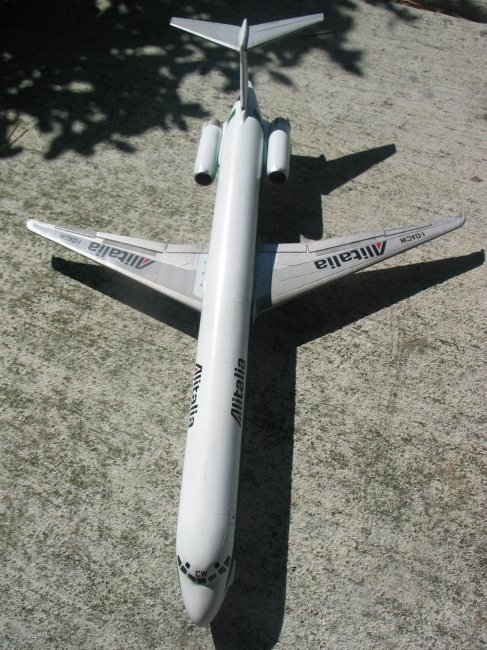
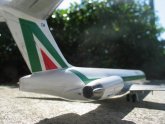
aircraft with the tail and the engines. I chose the tail cone with the
vertical end, because this is the type that Alitalia uses. Then, I attached
the wings, which have pieces of plastic coming out of them, which in the end
interlock when they join in the fuselage. The fit was incredibly well, and not
a lot of filling was needed. The stabilizers also had really good fit. I also
scratchbuilt some side walls and detail in the landing gear bays using wire
and styrene.
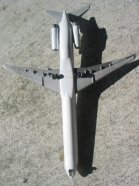
The engine
assembly was also very trouble free. The engine is made of two main pieces, a
part that depicts the exhaust, the fan blades, and the front cover. These went
together really smoothly with just a little putty being used, due to my
carelessness. I decided to attach the engines after the painting, because it
would be hard to apply one of the decals with the engines on.
After all
the assembly was done, I primed the whole aircraft and the engines.
Painting:
I started out
by painting the whole fuselage and tail section pure white. I knew that white
was a really hard color to work with, so I thinned it down to a milky
consistency, and sprayed one coat on the aircraft and the engines. I let that
dry, and did the same thing about 3 times until you couldn't see the primer. I
let this dry about 3 days just to be sure, since white takes a long time to
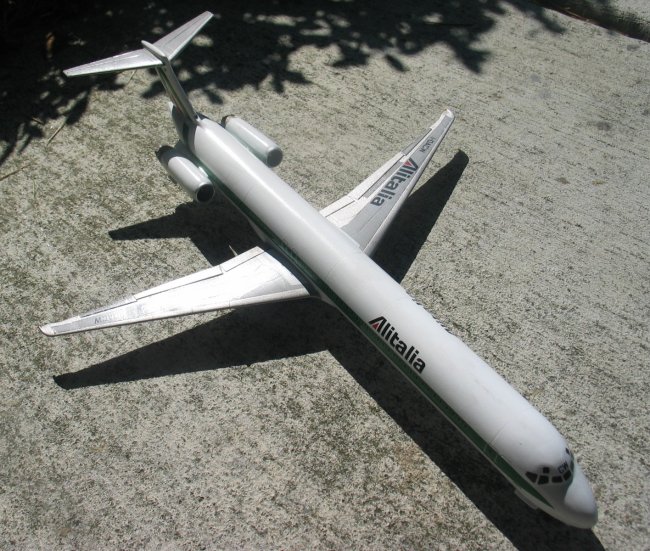
dry. I then began masking the fuselage so I could paint the wings and
stabilizers. I painted them FS 16440 Gray, which I had to make myself using a
mixture of Tamiya Sky Grey and White. I then masked certain areas on the wings
and stabilizers to paint silver. I made my own shade of silver, using
references from airliners.net. I combined Tamiya Chrome Silver and pinch of
Black. This made a sort of dark silver that really gives a realistic look. I
sprayed this on and let it dry. I also used this to paint the back of the
engines. When this was all done, I sealed the paint job with a coat of Future
and let dry.
|
Click on
images below to see larger images
|
|
|
 |
|
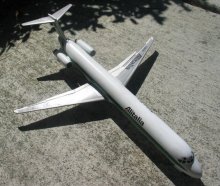
Markings:
I began to
apply the markings on the wings first. I must say these are the best Minicraft
decals I have ever worked with. They weren't too thin or thick, and looked
just stunning. I made one careless mistake though, which affected the whole
look. I applied the cockpit window decal first, which happened to be too low.
So, when I started applying the green stripe, the front part overlapped the
window decal. Thankfully, the green stripe was made of 3 pieces, so I moved
the front one an inch back. This didn't really affect any results, except for
the fact that the decal for the main door was not on the main door. Also, some
of the decals got torn during the process, but that was easily fixed.
Otherwise, the decal result was one of the best I've ever had. After
everything dried, I applied a coat of Future and let it dry for 2 days. I then
attached the engines, which also had a coat of Future on them.
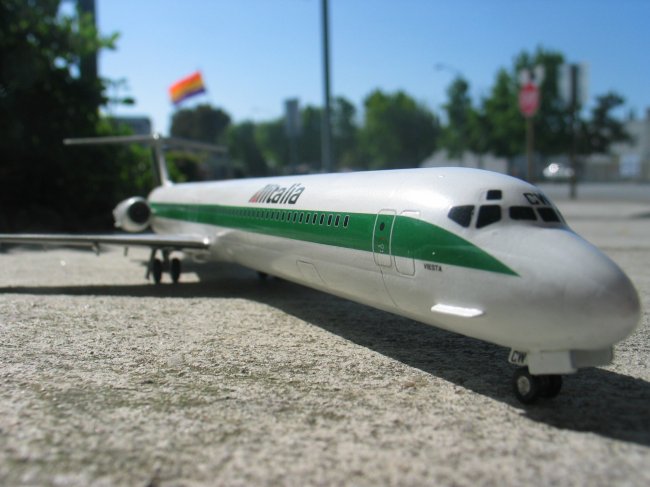
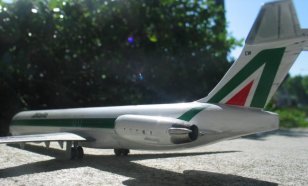
I then began
the weathering process. I decided to use the pastel chalk method. I mixed
brown chalk pastel and black chalk pastel. I applied this to the panel lines
on the fuselage, the wings, stabilizers, tail, engines, and the landing gear
bays. I slightly weathered the panel lines on the fuselage, but I made the
back bottom of the aircraft very dirty, which is how this aircraft is. After
cleaning everything up and making sure the weathering was perfect, I coated
the model with a coat of a mix of Future and Tamiya Flat Base.
|
Click on
images below to see larger images
|
|

|
|
 |
 |
Final Construction:
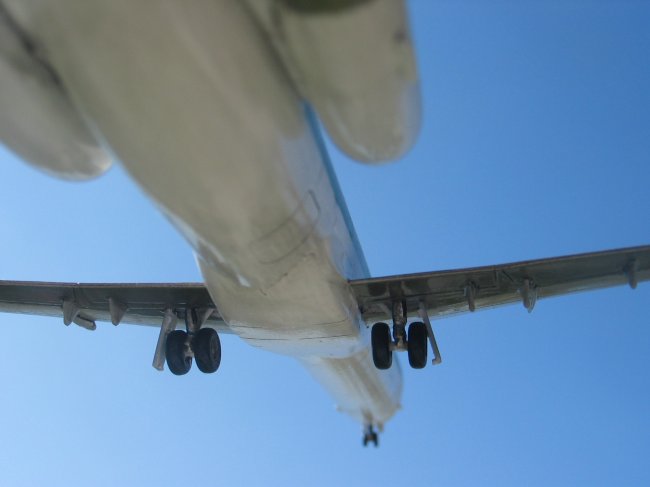
I began work on
the landing gear. I added some minimal detail to the gear using wires and
styrene sheet, since they're so small. I colored the landing gear white, and
colored the different wires silver and blue, with blue at the tips. I then
weathered the gear with Tamiya Smoke. I also put a drop of Tamiya smoke on the
white parts of the wheels, to depict dirtiness. I then attached the landing
gear to the bays using superglue. The fit here was very good, and there was an
extra part that held the landing gear in straight position. I also added the
landing gear doors. After this, I brushed on a mix of Future and Tamiya Flat
Base. By brushing this on, it gave the weathering a more realistic look.
Remarks:
I think this is one of the best
models I've ever done, in my opinion. This was the first time I tried mixing
different pastel chalks for weathering, and I think it worked pretty well. This
model couldn't have been made possible without the help of everyone on the ARC
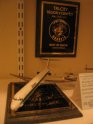
Discussion Boards, and the encouragement of fellow modelers. I am proud to say
this model won 1st place and Best of Show Juniors at the 2005 Tri-City IPMS
Region 9 Convention. I hope this review helps everyone out there with an MD-82
in their stash.
Dmitriy
|
|