|
History:
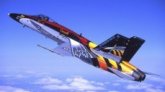
When the Royal Canadian Air Force was looking for a replacement to the CF-104 and CF-5, they turned to the CF-18 from McDonnell-Douglas. Between 1982 and 1988, Canada received 118 CF-18 Hornets, which were all stationed at No. 3 Wing in Bagotville, Quebec, and at No. 4 Wing in Cold Lake, Alberta. The CF-18 is used on missions with both the North American Aerospace Defense Command (NORAD), and the North Atlantic Treaty Organization (NATO). The RCAF has used the CF-18 in all of their major missions for air defense, air superiority, and tactical support. One of the largest missions was Dessert Storm and Desert Shield, where 24 CF-18s flew 5,700 hours in 2,700 patrol missions to protect the Canadian naval forces. From March to June 1999, 18 CF-18 Hornets were used for Task Force Aviano, fighting in former Yugoslavia to force the government of Slobodan Milosevic to withdraw its armed forces from Kosovo. Canadians flew 678 missions using air-to-ground and air-to-air precision guided munitions. This was the first time a conflict was won with the use of just airpower. Ever since 9/11, CF-18s have been used to regularly patrol Canadian airspace to prevent similar attacks.
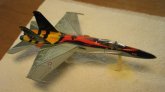
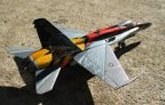
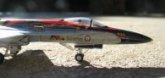
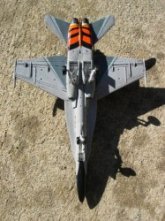
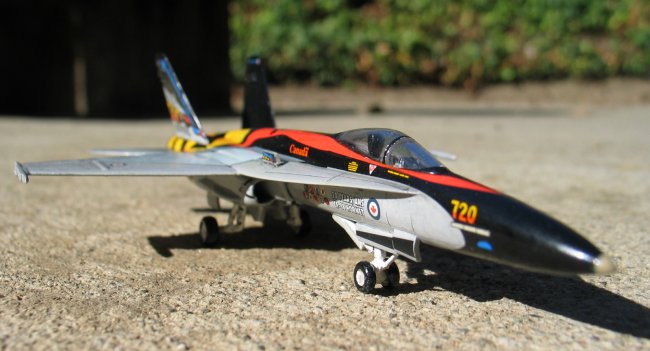
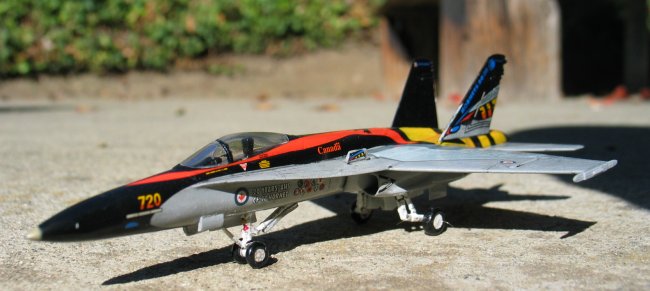
This particular aircraft has the RCAF 20th Anniversary of the CF-18 markings to commemorate 20 years of the CF-18 in Royal Canadian Air Force service. It also has a small emblem on the top of each tail that says "9/11 We Will Remember" to commemorate the victims of 9/11.
The Kit:
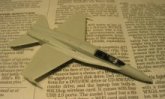
I bought this little kit at the Hamilton Air Museum in Hamilton, Ontario. I thought it would be fun to do such an amazing scheme on such a little aircraft. The kit itself is very well done. The detail from the cockpit to the scribing to the landing gear is just amazing for 1/144 scale. The cockpit came with decals to make it look realistic, and you could actually see wires in the landing gear bays. The instructions are very clear. I expected only the best from Revell and this is what I got. The kit comes with several different kinds of bombs and missiles, including 2 AIM-9Ms, 2 AGM-88s, 2 AGM-84s, 1 ASQ-173, and one TFLIR. There is also another decal option for VFS-115 "Eagles", USS Abraham Lincoln, U.S. Nave, 1997, Carrier Air Group Commander's scheme.
|
Click on
images below to see larger images
|
|
|
Construction:
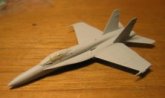
Construction began with the cockpit first. I assembled all the pieces together, painted them, and added the decals. I think this turned out great for such a small scale mode. The top and bottom halves came together smoothly, but the separate nose needed some sanding. The hardest part was the intake construction, which needed a lot of careful alignment and sanding with putty. Everything else went together perfectly. Not a lot of bad things I can say about the construction, but the painting was the craziest part.
Painting:
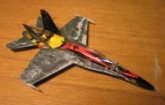
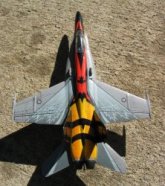
This was one of the craziest paint jobs I have ever done in my life, mostly because it was at such a small scale. I first started out by painting the top of the aircraft with a dark grey, and the bottom with a light sky grey. I then painted a small portion of the nose black, so the decals could blend in with it. The tails were painted black as well. Then came the hardest part. On the top back of the aircraft, I had to make sure to keep my stream of paint very thin. I sprayed it with yellow, and then two light streaks of light orange. On the bottom and on the sides, I used normal orange. This was tricky because of all the masking that had to be done to keep the yellow away from the orange. In the end, I think it turned out beautifully, but only the decals could tell if what had been done was a horrible job or a masterpiece. Of course, I sealed everything with Future and let it dry for 2 days.
Markings:
Like I said, the markings are beautifully done, but large colorful decals come with a price, besides the retail price itself. I was very anxious to finish the decals, but a lot of them had problems. The center decal with the Canadian maple leaf had some fit issues with the curves in the body of the aircraft, and so did all the decals from there until the nose. Everything else fit perfectly with the used of many applications of SolvaSet. In the end, the decals looked amazing. I sealed the decals with Future and let it dry for 2 days
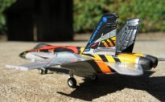
In a couple of days, I decided to weather the aircraft using the chalk pastel method. This worked very well and gave the demonstration aircraft the right amount of dirtiness it needed. The weathering on the wings reveals a lot of detail that originally comes with the kit. I sealed the weathering with a mix of 10% flat base and 90% Future, and let it dry for 2 days.
Final Construction:
After everything was sealed with Future, I began work on the landing gear and the small parts. I painted the exhaust with a mix of black, brown and silver and glued that on. Then, I painted the landing gear and weathered it with Tamiya Smoke to bring out some detail. I decided not to add any munition, since this aircraft is used for air show demonstrations. When all the little parts and finishing touches were done, I brushed on a coat of flat Future, and let it dry.
Remarks:
I think this one of the hardest paint and decal jobs I have ever done. This model requires a lot of patience, and if you put a lot of hard work into it, it will turn out wonderful. This was also the first model I did using my new Omni 4000 airbrush, and I must say it is wonderful. I must say that this model couldn't have been made possible without the help of everyone on the ARC Discussion Boards, and the encouragement of fellow modelers. I am proud to say I received 1st place for Junior Aircraft at the 2005 Silicon Valley Scale Modelers Kickoff Classic with this model.
Dmitriy Shapiro
|
Click on
images below to see larger images
|
|
|
|
|
|