|
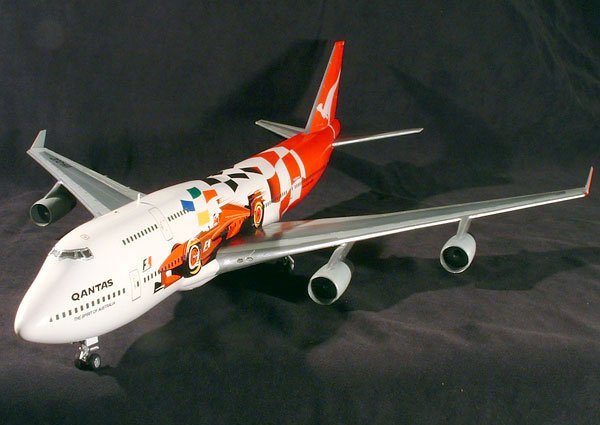
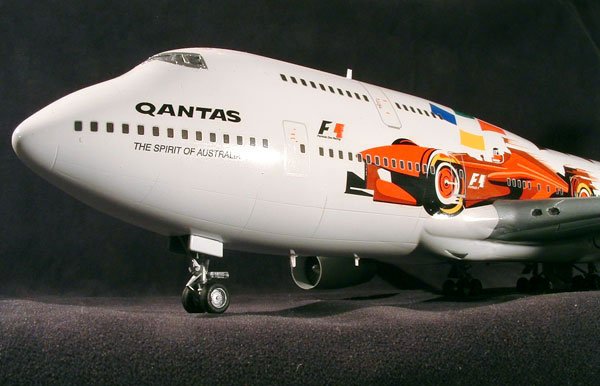
I was a kid the last time I built
an airliner but became inspired to do so after seeing a picture of a 747 in
Quantas livery with some really cool Formula 1 racing art applied. The fact that
the 2005 Formula 1 season was a few months away and an ARC airliner group build
going on provided all the motivation I needed to search the net for decals and a
model of a 747. I ended up purchasing the decals by Jet Decal and the Revell
Germany British Airways 747-400.
|
Click on
images below to see larger images
|
|

|
 |
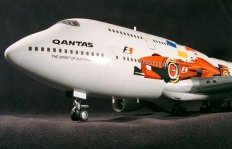
I had assumed this
would be an easy fun build. After all, I mainly build military aircraft and a
variety of racecars so I thought I'd combine my skills at getting a smooth gloss
finish with my plane building ability and bam! I'd have a great model! After
examining the kit and decals I realized what I had gotten into. The kit, while
mostly accurate, didn't contain a single part that wasn't surrounded by flash. I
also decided to fill in all the windows and use the window decals that came with
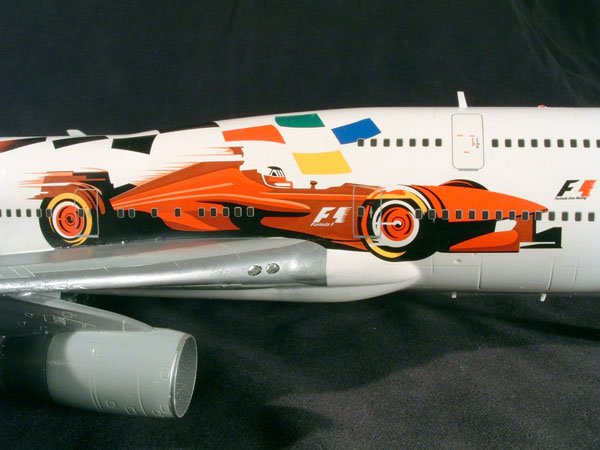
my aftermarket set. The decals looked nice but when comparing them to reference
photos I realized they were sorely inaccurate. There are no gradient or blending
of colors on the decals as on the real plane. The checkered red squares of the
decals were rectangular boxes, not wavy as the real scheme is. The red of the
decals had more orange than the "Quantas Red" I had grown accustomed
to seeing in my references. Also the area were the red checkers gradate to black
on the real plane were represented by solid burgundy checkers. I couldn't
correct all the inaccuracies without printing my own decals so I planned to
paint the checker scheme and use the rest of the decals.
After assembling the model entirely except for the landing gear (should have
left the engines off to be painted separately but live and learn) I primed the
model with white primer and used Tamiya pure white lacquer spray. Tamiya spray
paints are awesome and if you take your time with them you can achieve a
perfectly smooth gloss finish. I found that MM Italian red matched the decals
perfectly, even though it is a shade too orange to be "Quantas Red." I
used a roll of Tamiya tape and a number of new Exacto blades to mask the plane.
First I painted the wings using a custom mix of MM aircraft grey. I used MM
Chrome Silver for the bare metal parts and a custom mix of Tamiya grays for the
center of the wings as well as MM Metalizer titanium and jet engine exhaust for
the engines. I finally masked and painted the Italian red checker scheme. When I
removed all the masking I was elated! a perfect paint job! Sweet! If only I had
foreseen disaster was yet to come.
After the paint was thoroughly
dry I applied the decals. Despite their inaccuracies they went on like a dream
and only required a little Micro-Sol where the images of the cars meet the
wings. After the decals where dry I washed and dried the model in preparation
for the final clear coat. I chose Tamiya clear gloss spray lacquer having used
it on my many car models in the past. What I failed to realize was I had never
sprayed over MM enamels before with this stuff and despite what I already knew
(never use lacquers on top of enamels or lacquers or enamels on top of acrylics)
I proceeded to paint the plane. It looked good after the first light coat of
gloss but while starting the second coat I noticed that the paint on the wings
and the red on the fuselage started to lift and wrinkle.
Totally frustrated after all the work I had put into the paint job I went to bed
and let the model dry completely. a couple days later I used Tamiya polishing
compound, an old t-shirt and Q-tips to try to rub out the wrinkles in the paint.
This was fairly successful although the compound dulled the MM Chrome silver on
the edge of the wings. I also ended up repainting most of the top of the wings
(very carefully around the decals). After a final two coats of Tamiya Acrylic
clear everything seemed to blend nicely and I took a deep breath having only to
attach the landing gear and other small parts to complete the model.
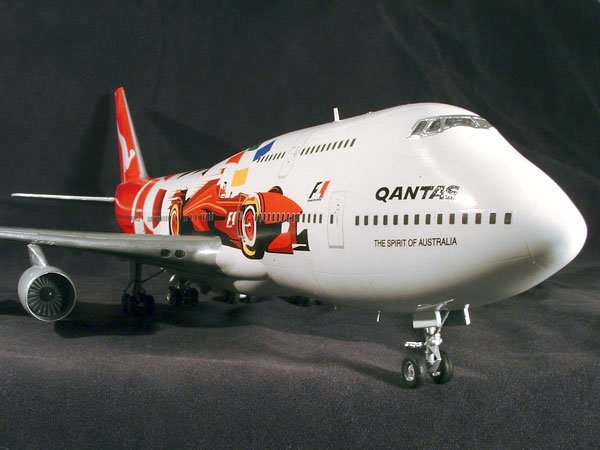
I knew it would be tricky getting all 18 wheels to touch the ground! I Attached
the nose gear and two sets of fuselage gear. The sets of gear under the wings
seemed to be the real problem. They were slightly too long (or the fuselage gear
were too short) and wouldn't sit right. I shortened them a hair with a file and
glued them with 5 minute epoxy. I then immediately turned the plane over on it's
gear and let the wing gears touch the ground so I could adjust them before the
epoxy set.
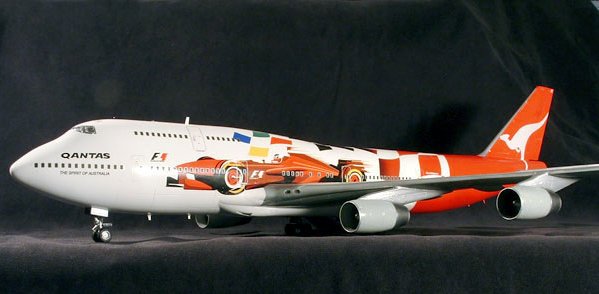
Finally completed! Even though it's not perfect I learned a lot and the next
time I decide to build an airliner I should have a much easier time of it. Knock
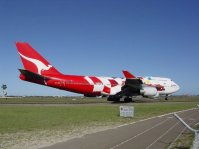
on wood. Below I've included a picture of the real plane as well.
If you would like to see more pictures you can visit my web site at http://www.scalemodelart.com
Happy Modeling,
Chris
|
Click on
images below to see larger images
|
|

|
|
|
|