|
History:
F4U-5
is post WWII aircraft differing from the F4U-4 by use of a redesigned engine
mount, by pushing the mount on the frame further forward resulting in a longer
cowling area. Along with moving larger air intakes to the right and left side of
the cowlings became the most distinctive features of this aircraft. The F4U-5N
differed from the -5 via a radar radome installed in the right wing, gun flash
suppressors for the four 20 mm cannon, autopilot to reduce pilot fatigue,
exhaust suppressors and an extra radio antenna. A -5NL version was equipped with
de-icing rubber on the leading wing edges, water and methanol-injected de-icing
system for the propeller leading edges and the front windshield, all
specifically designed to cope with the harsh Korean winters. Total production of
-5N Corsairs was 214, 101 -5NL Corsairs were produced.
Construction:
Kit
was built OOB, and is a direct copy of the Hasegawa F4U-5/5NL kit #JT75, right
down to the part numbers. The instructions are all in English and appear to be
more simplified than the Hasegawa
version and call out the how to build the -5, -5N and -5NL versions. Decals are
for one F4U-5NL from VC-4 in Korea or a F4U-5 from NAS Glenview.(these were not
used for this build). The Pro-Modeler kit is a lighter gray plastic, otherwise
no difference in the build of the kit from Hasegawa’s version. Please see
other F4U-5 Hasegawa build articles for information.
|
Click on
images below to see larger images
|
|

|
|

|
Painting:
My
main reason for this article is the use of the new Tamiya Spray Paints. In my 20
years of modeling I have gone from paintbrush to air brush to spray cans.
Obviously spraying is preferable over hand painting. However, airbrushes are
difficult to maintain and keep clean. So in my quest to keep things simple, I
used enamel spray paint cans. These must also be kept clean, but the effort
involved is less than airbrushes. You must make sure you clean the spray nozzle
otherwise you better have spares because they do clog. This new line of Tamiya
spray paint is not enamel or acrylic, it is synthetic lacquer as the following
information taken directly from the Tamiya site explains:
TAMIYA
COLOR SPRAY PAINTS (TS)
These
cans of spray paint are extremely useful for painting large surfaces. The paint
is a synthetic
lacquer
that cures in a short period of time. Each can contains 100ml of paint, which is
enough to fully cover 2 or 3, 1/24 scale sized car bodies. Tamiya spray paints
are not affected by acrylic or enamel paints. Therefore, following the painting
of the entire assembly, details can be added or picked out using enamel and/or
acrylic paints. By combining of three different paints, the decoration of
plastic models will become simpler and more effective.
TAMIYA
COLOR SPRAY FOR AIRCRAFT (AS)
The
new Military Aircraft Sprays are available with six colors each for US, German,
UK, and Japan color schemes. The new Aircraft Sprays are a welcome solution for
that next military scale plastic project as well as the new closed cell foam R/C
Park Flyers.
Tamiya
site:
http://www.tamiyausa.com/product/paints/index.html
I
wanted to use one color for starters, so building an all black F4U-5N seemed to
be the right fit to use the semi-gloss black #TS-29.The output of spray is very
fine, which will cause you to spray two coats or possibly three to get full
coverage. I find this to be a good thing, where as the enamels come out very
heavy, if you loiter for to long of a second you will get a glob of runny paint.
With this paint it is nearly impossible for this to occur, it sticks and dry’s
very fast. I used enamel silver spray paint as an under coat in order to create
the paint chipping affect by using tape to pull off the upper coat of paint.
This turned out to be a little more difficult, the Tamiya paint adhered to the
enamel almost too good, I needed to press the tape on 4 to 5 times before any
black paint started to “chip off ”. The nozzle is well constructed and the
can easy to hold, Paint can was easy to clean, one short 1 second burst(upside
down) did the trick. I have yet had paint clog the nozzle. When dry this paint
has a very smooth satin type finish.
Decals:
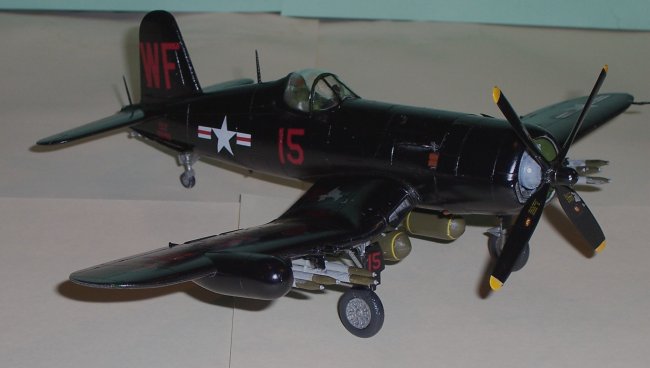
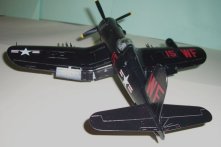
From Hasegawa kit #JT75, VMF(N)-513, Capt. Eugene Derrickson, Korea 1951. Decals
adhered fine to the Tamiya paint, using Solve Set to snug them down. I usually
spray a gloss coat on before decaling, but it did not seem to need it. My hunch
was correct, no problems with the decals.
Conclusion:
The kit was excellent and had no build problems, since it was a Hasegawa kit. If
you want a F4U-5/NL this is a couple of bucks less than the Hasegawa version,
it’s yours for the taking. The paint is the way to go, with Tamiya’s new
line of military colors for Japanese, U.S., German and British, some color
limitations, there is No Runs, No
Drips, No Errors!
References:
Hasegawa JT75 instructions,
Web
site: http://www.kalaniosullivan.com/KunsanAB/VMF513/Howitwasa1ac.html
Note:
Am planning another paint article using this paint for mid war navy tricolor
aircraft. I have completed 2 Hellcats, a Corsair and Avenger in these colors
with superb results.
Mark
| Click on
images below to see larger images |
 |
 |

|
|

|
|
VMF513 |
|