|
Having seen a number
of Hawks at model shows, I rather wanted to build one, so my fiancé John dug
into his seemingly bottomless stash & presented me with an Italeri Hawk T1,
a pair of Airwaves resin Martin Baker Mk10 ejection seats and Modeldecal sheets
115 and 116. I
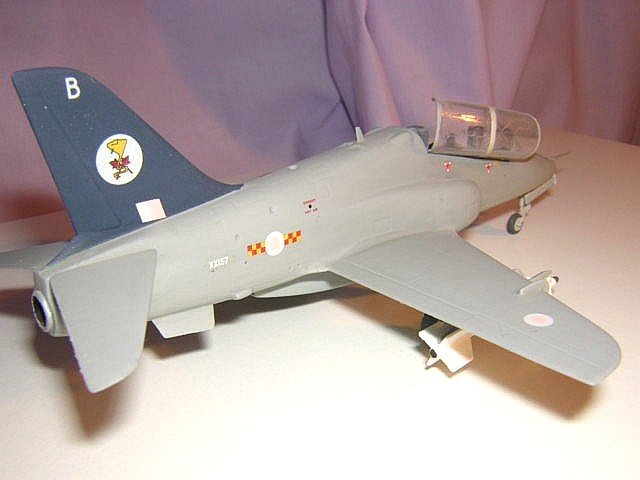
perused the decal sheets & eventually settled on a Hawk T1A of 92 (Reserve)
Squadron in air
defence grey with a dark blue fin, fitted with a gunpod & underwing
Sidewinders.
I built the kit more
or less straight from the box, with the exception of a set of Airfix landing
gear doors since John had a spare set from a kit he made a mess of & the
Italeri ones are a joke. Sadly, the Airwaves seats turned out to be too
big to fit the cockpits without massive amounts of surgery & I had to
substitute the kit seats. Naturally,
this didn’t become apparent till the model was built & the seats were
lovingly painted – I was NOT pleased!!!
In general, the kit went together well, needing just a little filler here
and there, but the windscreen was a distinctly poor fit , so this was masked out
with Bare Metal Foil before it was fixed in place & filled round the edges .
Once all was satisfactory I gave it all a final coat of primer
& brush painted with Humbrol enamels, followed by several coats of acrylic
gloss to ready the model for the decals.
Since John had warned me that Modeldecals were distinctly less
user-friendly that those I was used to, we decided that I’d use the national
markings & stencils from the kit sheet & just use the squadron markings
& serial numbers from the Modeldecal sheet.
Having seen the amount of cursing John was doing whilst applying a full
set of Modeldecals to his Airfix Canberra conversion, I’m certain I made the
right decision . After
a wash to remove the decal glue & setting solution residues, I applied a
final sealing coat of gloss, fitted the landing gear, pylons, missiles &
seats, then John sprayed
the final matt coat for me .
I removed the windscreen masking & attempted to fit the canopy, this
last proving highly unsatisfactory due to the reluctance of the canopy to fit
over the internal windscreen for the rear seat.
Consequently, I decided to fix the internal screen inside the canopy
& fit it in the open position.
This had a happy ending since I think the finished model looks far more
attractive with the canopy open than it does with it closed.
Catherine
|
|