|
Well,
after
my last few massive novel type articles, I thought I would make this one fairly
short and sweet and just leave you with some eye candy!!
Actually,
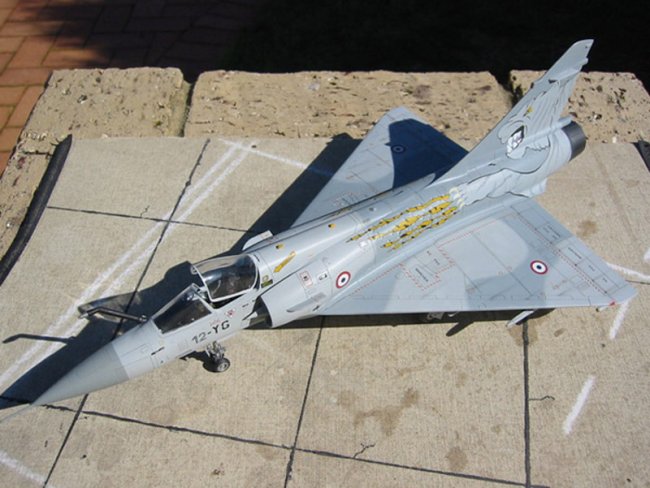
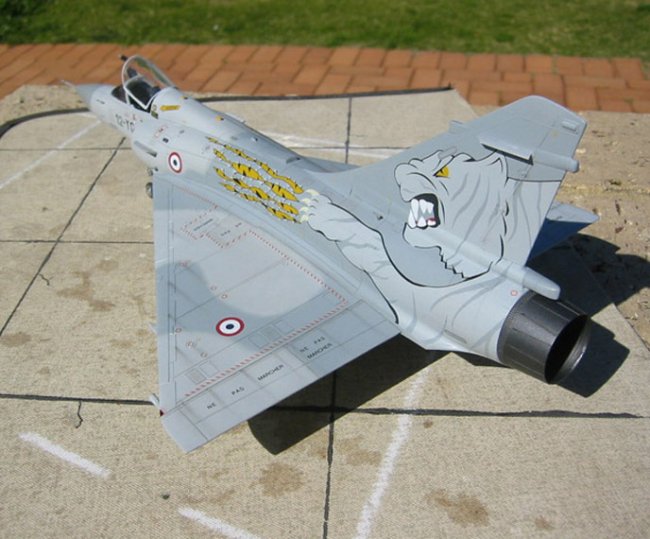
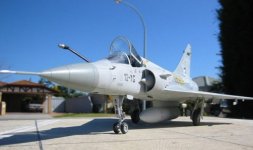
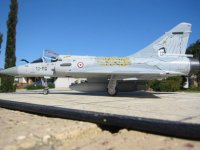
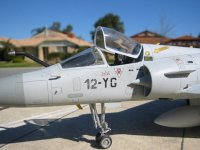
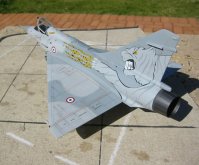
there's not too much to tell. It is the Italeri rendition of the Mirage 2000,
and is pretty much OOB, aside from those stunning decals!! I'm not really much
of a fan of French aircraft of any era, but after I saw this decal sheet on the TwoBobs
website, I fell in love with them. I just HAD to have 'em! This is one of
those occasions where you buy that magic set of decals, and then worry about
going out and finding a kit to put them on later!!
|
Click on
images below to see larger images
|
|
|
 |
|
As
I didn't have a huge interest in the aircraft itself, there wasn't the
motivation to do any real detail work, so as mentioned earlier it is essentially
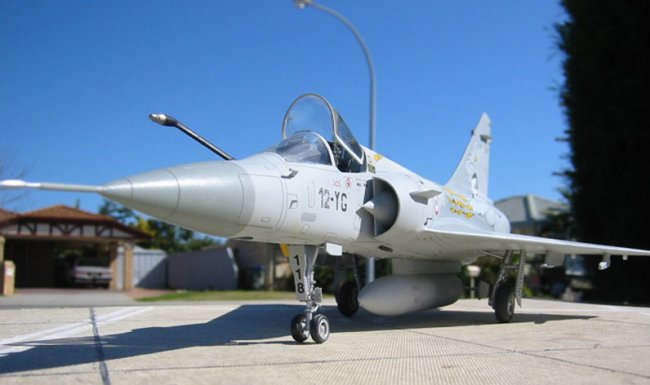
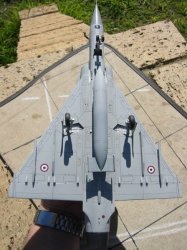
OOB. I did however replace the seat, as the kit one was pretty crap. The rest of
the kit was built (IIRC) as per instructions. As Italeri kits go, it's one of
their better ones, it still needs filler, but is nowhere near as nasty as their
sub standard, festering and simply shocking F-22!! (Sheesh, why don't I tell ya
how I really feel!!!) The biggest pain in the neck with the kit was that sodding
refuelling probe. There were no locating pins of any description to help align
it, just a vague "about here" arrow in the instructions. I had to rely
on reference pics of the real bird for attachment location and angle. Just keep
that in mind if you decide to build one and you should be cookin' with gas!!
Essentially
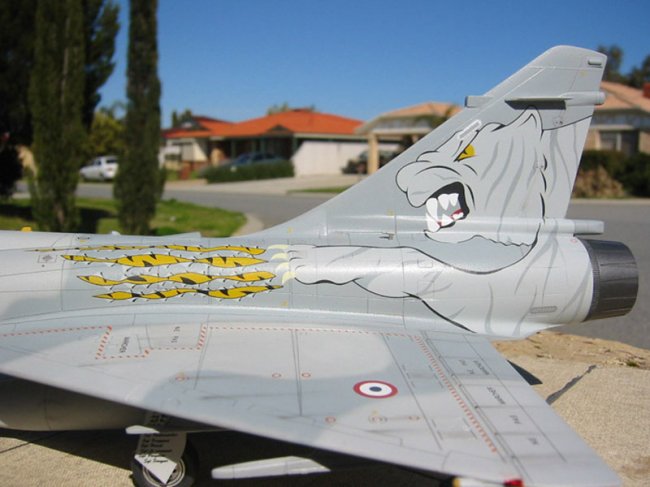
I wanted something to showcase those beautiful TwoBobs decals! I have a stack of
them in my collection, and figured it was about time I tried them out. Trust me
people, these decals are nothing short of breathtaking. If you have been
deciding whether or not to give a set of TwoBobs a go, I thoroughly recommend
them! You will not be disappointed! They are lovely and thin, whilst also being
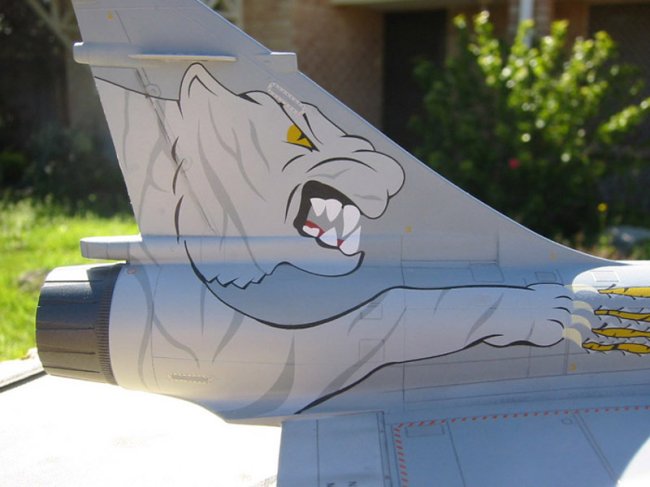
exceptionally strong. The tiger head and claw are actually one decal (the
striped rips are a separate decal), and looking at the size of them, I actually
woosed out and decided to cut them in half and apply the head and leg/claw
separately. The decal is actually so strong that you could quite easily apply
them without cutting and they wont tear.
|
Click on
images below to see larger images
|
|

|
|

|
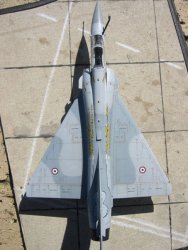
I
used my trusty Polly S decal softening solution to make sure all the decals sat
down snugly into any panel lines. They reacted beautifully and snuggled down
tight. After setting, another coat of floor polish and a flat coat to complete
the illusion of painted on markings.
The
only real regret I have is that I think that the dark grey doesn't quite seem
dark enough when compared to the photo's of the real bird, however, knowing
TwoBobs attention to detail and how pedantic they are in getting it just right,
maybe it's just the lighting in the photo. In any case, this little jet has won
me a few awards at both club and state level modelling competitions.
Congrats
to TwoBobs for simply stunning decal sheets. One TwoBobs sheet down 12,007 to go
(well, the pile looks that tall anyway  ....) ....)
Happy modelling, and may your paint never harden in the bottle! Enjoy the pix!
Sam

|
Click on
images below to see larger images
|
|
|
|
|
|