|
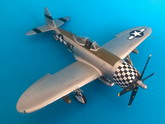
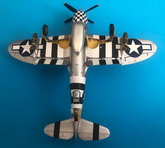
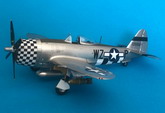
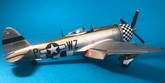
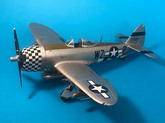
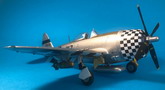
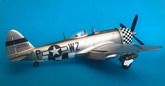
Here is Tamiyas 1/48 P-47D Bubbletop built in a D-Day natural metal scheme.
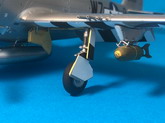
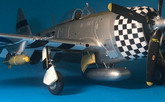
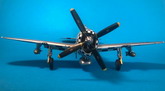
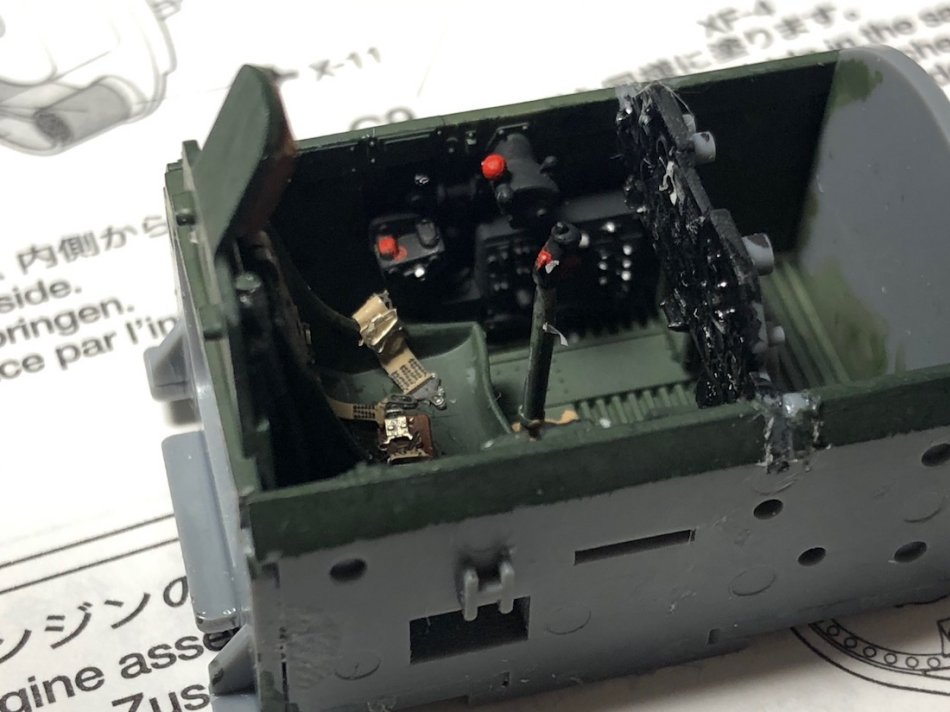
I built the kit from the box and only added Eduard WWII seatbelts. Although released in 2003, this kit rivals later Tamiya kits in design and assembly, including its 1/48 P-38. I did not use any filler to complete the model, and the wings and horizontal stabilizers are attached in a manner that nails the correct dihedrals for both. The kit includes a well-detailed cockpit and wheel wells. I also liked the way Tamiya designed the sturdy landing gear attachments to allow the model to sit correctly when displayed gear-down.
|
Click on
images below to see larger images
|
|
|
The kit allows you to build one of two versions, so, for example, the kit contains multiple propellers. One has to choose the version prior to assembly and then make sure one assembles the correct parts for that version. I spray-painted the natural metal with Floquil Bright Silver. I have tried numerous aluminum/bare metal paints and this one seems to give a nice aluminum finish. Once dry, it also allows you to handle the model without rubbing off the paint or smudging it with fingerprints. I have also found that it can be polished to a slightly higher sheen using a soft cotton cloth. After spraying the cockpit with Model Master Interior Green, I brush-painted the rest of it using a variety of inexpensive hobby store flat acrylics. I also hand-painted the wheel wells with Americana Yellow Ochre acrylic, which I found created a reasonable facsimile for the yellow zinc chromate often used by Republic on these aircraft.
I chose the D-Day scheme primarily because of the checkered cowling. I was afraid the decals for this would be quite a challenge, but applications of Micro Sol and, in some places, Solvaset, snugged them down. Because of their age, the decals tore in some places and required touching up using flat black and flat white. The only decal problems I had were with the D-Day stripes, which, in hindsight, I would have been better off to cut them into smaller shapes before applying them. Rather than airbrush a flat clear coat over the entire model thereby dulling the sheen of the natural metal finish - I used a wide brush to apply a coat of Testors Dullcote lacquer to flatten the sheen of the larger decals. Overall, this is a delightful kit to build. The detail, assembly design and fit are all excellent. Based on this experience, Ive decided to tackle the Tamiya P-47D Razorback for my next aircraft modeling project!
Blair
Stewart
|
Click on
images below to see larger images
|
|
|
|