|
|||||||||||||||||||||
|
|
|
|||||||||||||||||||||
|
|
|
|
|||||||||||||||||||||||||||||||||||||||||||||||||||||||||||||||||||
|
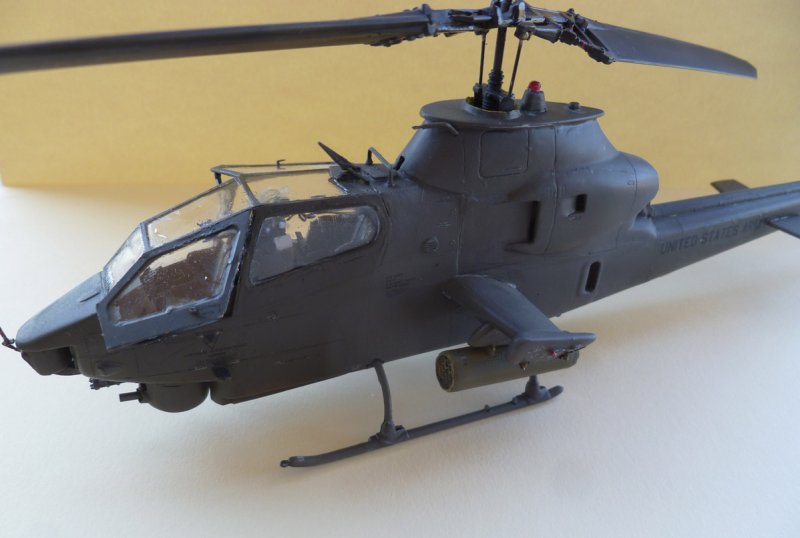
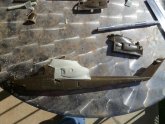
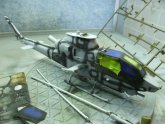
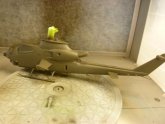
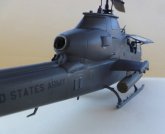
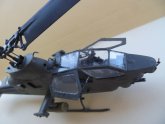
Back in 2000, I joined the Historic Aircraft Restoration Society (HARS), then based in Bankstown, New South Wales. We had obtained two Bell AH-1P Cobra helicopters, 76-22592 and 76-22598 from AMARC. They had been de-militarised together and neither had the same damage inflicted on the airframes, which would allow us to build one serviceable airframe out of the two. Shortly after I came onto the project, we decided on 76-22592 as the flier and 598 would sacrifice her serviceable parts to become a static only. Unfortunately, despite a test-bed run serviceable engine, overhauled main transmission and all other serviceable rotable items being decided on and ready to fit, the project ran out of money. Bell werent keen on it flying, either, as it had notionally been destroyed. Ive had the Revell-Monogram AH-1S in the stash for many years and pulled it out last year to make this. There were lots of additions and modifications to make this into an AH-1P. The AH-1P was essentially an AH-1F with the AH-1G turret, flat-plate windows, T53-L-703 engine and TOW capability.
Click on
images below to see larger images The following mods were made:
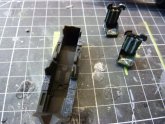
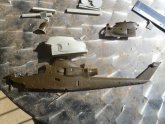
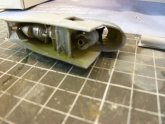
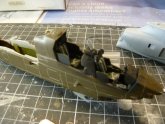
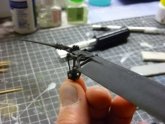
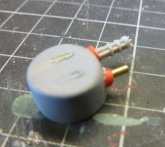
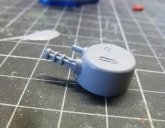
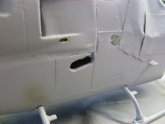
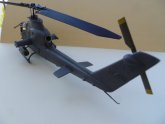
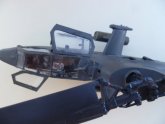
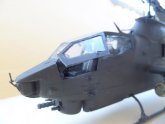
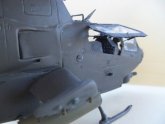
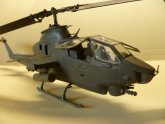
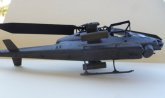
Modified and fitted the Cobra Company's engine and transmission cowls, chin turret and seats Fitted Eduard's etched set (door handles, door frames, gunner's mirror, gunsight and tail rotor Cut the Main Rotor Blades free of the Hub, modified the Hub Grips to look more like they should and twisted the blades to look like they usually do at rest with wire supports Cut the bulged windows out of the frames and replaced them with scratchbuilt flat window panes Opened the doors and scratchbuilt gas struts for both Made the Helmet Sighting System from wire rod, plastic and copper wire strands Made wander lights and leads from scrap plastic and copper wire strands Made intercom leads from copper wire strands Replaced the engine with one from an old UH-1D kit (you cant see it, anyway!) Added the M134 Minigun (from an old Fujimi OH-58 kit) and M129 40 mm grenade launcher (from brass tube) barrels to the turret Fitted weapon sway braces from a Tamiya P-51D to the outer wing weapon stations Fitted spurious brass etch from the Eduard Tornado GR.4 set to the outer weapon stations Scratchbuilt an exhaust vent and engine exhaust deflector mounts above the Tailboom junction Modified the Pitch Change Links to fit the deflected Main Rotor Blades Scratchbuilt anti-collision and navigation lights from stretched clear sprue Made vent screens for the lower aft Tailboom access panel Made a Fuel Filler Port and Fuel Cap from old steel etch Opened up the engine intakes and cowl vents Opened up the Main Transmission and 42° Gearbox inspection windows and filled the holes with Future Used HGW rivets to replace those removed in sanding (theyre done very subtly on this kit, so I retained them) Lightly weathered the Tail Rotor Drive Shaft access panels under the exhaust where the heat had discoloured the finish a little and added light staining to the lower fuselage Werner's Wings AH-1F stencil sheet decals used for all markings
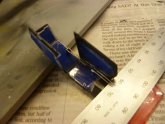
The Cobra Company Engine/Transmission Cowl needed to be heated in hot water and remoulded to fit the fuselage cuts. I shouldnt have cut the windows out as the replacement plastic ended up with too much PVA glue on them and became distorted as a result. Lots of filling with stretched sprue and Mr Surfacer 500 was needed on the joins (primarily where I did the major surgery). The rotors were left off until the model was finished and theyre still just placed in position, not glued. Painting was done using photos I took of our aircraft during the restoration, as well as a few from the web and the Squadron AH-1 Cobra Walkaround book. The US Army Maintenance Manual and AVUM with Parts were very useful references (luckily I had them still on USB!). I used Mr Surfacer 1000 as a base and coated that with Testors Model Master US Helo Drab. The same companys Metalizer Brass, Olive Drab and Flat Black also made an appearance, as did Aluminium (or is that Aluminum in US English?). Humbrols yellow enamel was sprayed on the Tail Rotor Blade tips (the K747 blades are black everywhere). I didnt flatten the black as much on the Main Rotor Grips, Hub and Mast as theyre really flat, rather than matt (as are the Tail Rotor Blades). Tamiyas clear green and red enamels were used on the navigation and anti-collision lights. Future gloss coat went on before decals and Future with Tamiyas X-21 flattened it all afterward. Only the rocket pods were fitted as we never got any of the TOW gear with the aircraft. Rob Nieuwenhoven
|
||||||||||||||||||||||||||||||||||||||||||||||||||||||||||||||||||||
Photos and text © by Rob Nieuwenhoven