|
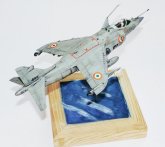
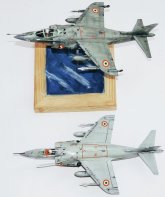
Sea Harrier FRS.51,
Indian Navy, INAS 300, "White Tigers"
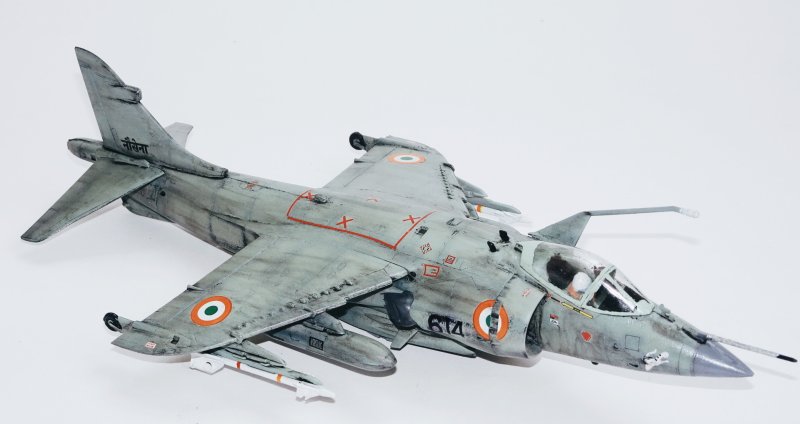
After my successful build of the same kit a few months ago, which was rather clean and pristine, I wanted to try my hand at depicting a Harrier in a "close-to-retirement-days" look.
The BAE Sea Hawk was phased out from the Indian Navy in 1978, in preparation for the purchase of Sea Harriers. In November 1979, India placed its first order for six Sea Harrier FRS Mk 51 fighters and two T Mk 60 Trainers; the first three Sea Harriers arrived on 16 December 1985 at Dabolim, Goa. Ten more Sea Harriers were purchased in November 1985; eventually a total of 30 Harriers were procured, 25 for operational use and the remainder as dual-seat trainer aircraft.
India has operated Sea Harriers from both the aircraft carriers INS Vikrant and INS Viraat (ex-HMS Hermes). The Sea Harrier allowed several modern missiles to be introduced into naval operations, such as the British anti-ship Sea Eagle missile, and the French Matra Magic missile for air-to-air combat. Other ordnance has included 68 mm rockets, runway-denial bombs, cluster bombs, and podded 30 mm cannons.
The Sea Harriers operated from INS Viraat for the last time on 6 March 2016. On 11 May 2016, a ceremony was held at INS Hansa, Dabolim, Goa to commemorate the phasing out of Sea Harriers from INAS 300 ("White Tigers"). Sea Harriers and MiG 29Ks performed an air display at the ceremony, marking the final flight of the Sea Harriers in the Indian Navy. INAS 300 subsequently introduced MiG 29K/Kub fighters to replace the retired Sea Harrier fleet.
|
Click on
images below to see larger images
|
|
|
The kit:
I picked up the Hasegawa 1/72 kit. It is a great, simple and easy kit to work with. It just goes together without any problems. However, from my previous experience, I learnt that once the fuselage and wings are assembled, it would need filler all along the fuselage seam line from the nose to the starting point of the vertical stabilizer, on the top side, from the nose to the gun pod assembly on the underside and all along the top of the left wing root. So I promptly filled up the seam line with Comfill automotive filler and then with progressive dry and wet sanding with 100-220-400-600-1200 grit sandpapers, I achieved a smooth finish.
Scratch building:
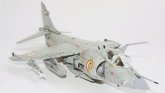
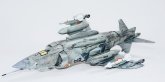
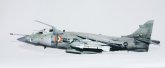
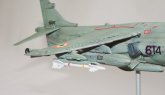
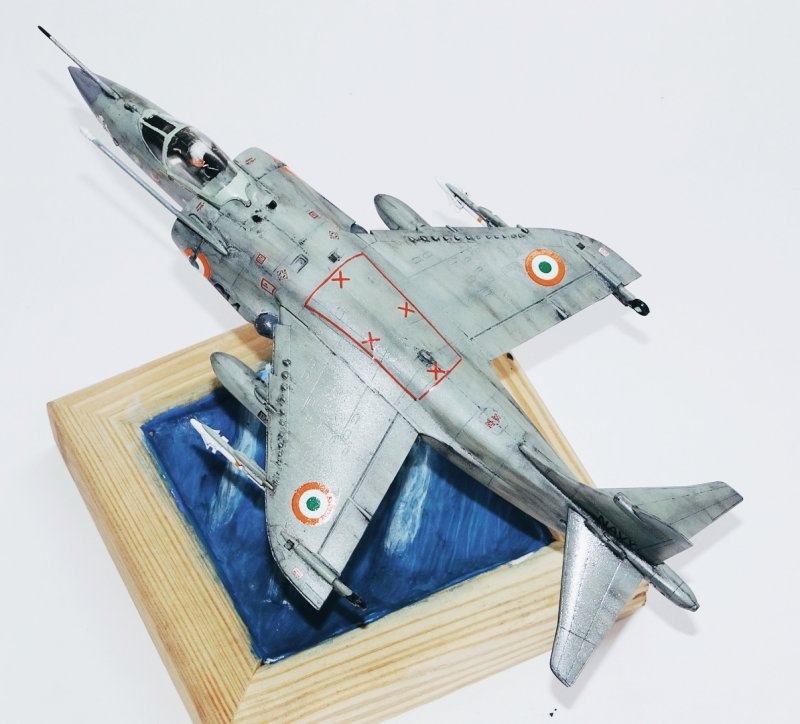
The kit includes 2 Sidwinder AAMs and two standard drop tanks. However, the Harrier FRS.51s carried the French Matra R.550 Magic AAMs. So I scratch built some control surfaces with plasticard, to convert the Sidewinders into Magic AAMs. You can see the converted AAMs in the pictures.
Painting and decals:
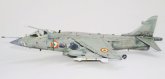
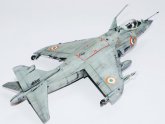
Once the airframe was assembled, I primed it using "Bosny Grey Primer" and then pre-shaded using Black and finally began painting. The paints I used were from the Fevicryl range of paints available in India, and I mixed "Black", "White" and "Sap Green" colors to achieve the Indian Navy "Greyish-Green" or "Greenish-Grey", depending on how you want to call it. The painting was easy and was completed in one single sitting of 3-4 hours. Once the painting was over, I came to the tough part. I did not have the decals for the "White Tiger" logo, so the only choice I had was to hand-paint the pouncing white tiger. I practiced painting the White Tiger with a size-0 paint brush for a full day. Once I was convinced that I had the general idea of how to go about painting it, I took the plunge and painted it onto the Harrier's nose in 3cm by 3cm of available real estate. It was a make or break situation and by very slowly and with a steady hand, spending 40mins on each White Tiger, I was able to paint it on the nose successfully.
Once the paint dried, I gloss coated it and applied the Indian Navy decals from "Bright Spark". This was nothing out of the ordinary and with the decalling phase over, I began weathering.
Weathering:
The goal of weathering was to show an old-worn-out-and-close-to-retirement-days look on the Harrier to depict more than 3 decades plus of service. The weathering wash was created with Camlin Soft pastels and I mixed some brown and blue with water and a few drops of dish-washing liquid. This wash was then applied liberally all around the model. After leaving it to dry for about 15-20mins, I cleaned up with a paper towel and did some in-depth cleaning by using cotton cue-tips. The Indian Navy Sea Harriers were very well maintained and clean till their retirement in 2016. However, to depict a slightly worn-out-and-close-to-retirement-days look, I left a wee bit of weathering on the model.
Finally I sealed the effects and paint with Brustro Artist's acrylic varnish as a gloss coat and I am happy to say that this has been my best Harrier creation so far.
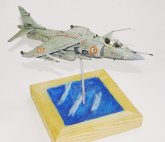
The scene:
I wanted to make the Harrier in a flying configuration, wheels up, so I created a small diorama to mount it on. Nothing too fancy, I used a photo frame, 5"x5", and with some Fevicryl 2-part epoxy putty, I created the ocean and gave it some contours to depict the ocean waves. I painted the ocean in the murky blue water color of the Indian Ocean and dry brushed some white on the waves to show the highlights. I then drilled a hole in the centre of the ocean bed and mounted a piece of sprue on which to mount the Harrier later on.
So as a tribute to a wonderful machine and engineering marvel it has been, to the 3 decades of unrelenting service to the motherland and to the men who flew it, I sign off and leave you to enjoy the article and the pictures and await your comments.
Vande Mataram
Sherbir
|
Click on
images below to see larger images
|
|
|
|