|
Nardi F.N.305,
Scale 1/72
Make Azure
Cost 9 Euro
Type Short run kit with brass detail parts and vac form canopy.
History
First flown in 1935, the FN305 was initially a single- or tandem 2-seat aeroplane designed for training, touring or sporting duties. It had a large glasshouse canopy and was originally powered by a 200 HP Fiat A705 radial engine. It had a retractable undercarriage that helped it to attain a fair level of performance. The Piaggio Company started building the FN305N, a two-seat version powered by an Alpha Romeo 115 six-cylinder engine that provided 190 HP, and the type was used by the Italian Air Force as a fighter trainer and liaison aeroplane.
Between 1937 and 1943 production totalled 258 including small numbers of FN305B and C type, which was, single seaters and open and enclosed cockpit respectively. A short while before Italy entry into WWII it supplied 36 Nardi FN 305 to the French Armee de l’Air for use as a fighter trainer role. In due course the few French examples remaining were taken over by the
Luftwaffe.
Click on
images below to see larger images
The Kit
This is yet another Kit made by “Azure” i.e. tooling and moulding in the Czech Republic with design input from France. The box cover has beautiful artwork by Vladimir Kazda. This depicts a Nardi FN305 in overall cream finish, the personal aircraft of Squadron Leader Tito Falcone of the 23rd Group. This can be of use during detailing the kit or fixing the decals in place.
In spite of the small size of the Nardi you still get a lot when you open the box, for there are around 31 injected moulded parts in grey plastic and resin, and 12 tiny brass etch parts . SO there are enough detailed pieces to turn it into a beautiful little model. The resin parts cater for the more intricate pieces such as the front of the in-line engine nacelle, which has two air
intakes difficult to produce by other means, and the two pilot and student seats which have integrally moulded and finely detailed seat harness with buckles. The brass etch parts comprise link actuators to rudder and flaps, as well as other detail pieces to go around the undercarriage. There is also a pitot tube, but this has a flat section which I preferred to replace with one made from steel wire. Instrument panels also come in brass, with clear acetate sheets with dials printed in black.
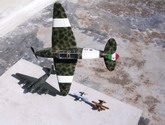
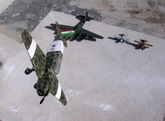
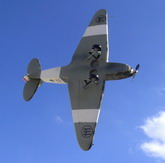
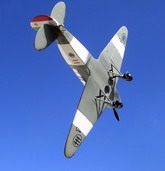
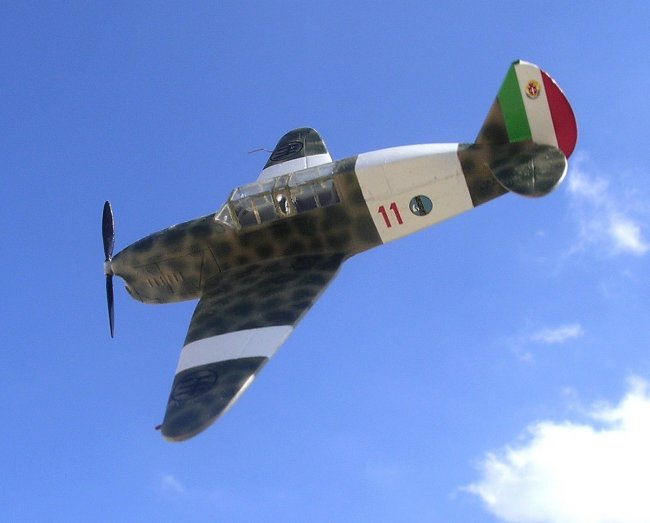
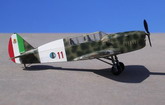
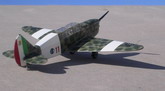
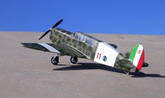
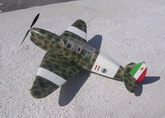
The kit contains three decal options. One of these is the aircraft flown by Tito Falcone mentioned earlier. The other Italian Air Force one has green mottle on a sand background with light grey underside. There are white bands on the fuselage and both sides of the wings, which was a common marking feature on Regia Aeronautica aircraft of the time. This gives a more contrasting scheme and in fact this scheme was the one I chose for my model. The third offering is an overall silver finish French aircraft in service circa 1940.
Construction
The first task is to assemble the cockpit interior consisting of floor, resin seats, and control columns, allow this to dry and then paint as required. Incidentally the instructions serve as a good guide. This is put aside for a later stage.
The wheel well box, item No8 contain fine detail panel lines on the inside. When this is fixed to the lower wing part No 22 one should ensure that these panel lines would align and correspond with those on the wings.
It is recommended to fix the cockpit bulkhead, item No 15 which is in the rear of the cockpit after two fuselage halves are glued together and allowed to dry first. The cockpit assembly consisting of floor, seats etc, was then inserted from the opening at the bottom. Incidentally the fuselage halves do not have locating holes to serve as guides, and what I did was cut small bits of sprue and stick these to one half inside and protruding at the edge at three separate places. The other half will then align easily and mates perfectly.
When separating the wing parts from the sprue, it is advisable to use a saw blade. This will avoid the risk of taking away part of the wing while removing the tiny gates between the wing parts and the sprue. There are no slots in the wing section to take the wing unit and tail plane parts, as these are butt jointed. So extra care is needed when aligning and fixing these parts in place.
The kit canopy is vac form type. Two canopies are provided. The method I recommend is to cut the surplus acetate as close as possible to the final shape of the cockpit, and the final fitting shape is obtained by cutting the remaining excess little by little using a sharp exacto blade until the best fit is obtained. A tiny trim tab is added to the port aileron which seems to be present in the instruction sheet paint guide drawings.
Painting and decals
Kit is airbrushed in Italian brown and dark green mottle added on it. This is followed by underside grey and the kit was given a coat of Klear. The decal sheet, which can only be described as excellent in all respects (if not for the green shade of the Italian fin markings which is on the pale side).
Conclusion
All in all the kit was a fairly simple one to build and certainly makes another addition to my ever-increasing Regia Aeronautica scale model collection.
Carmel J Attard
Click on
images below to see larger images
|
|