|
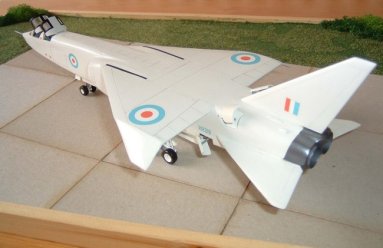
Here is my 1/72
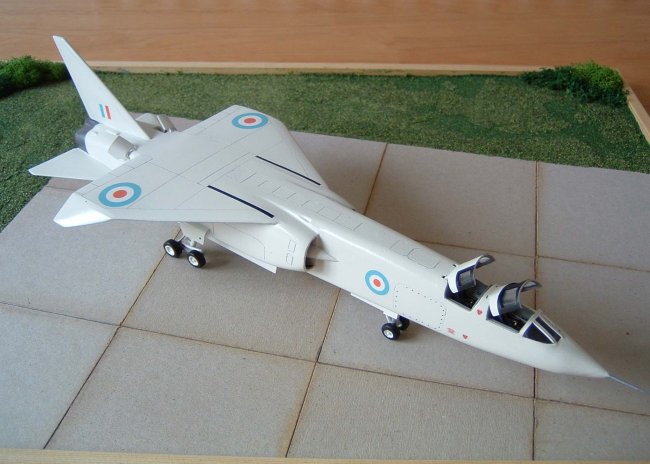
scale BAC TSR-2 model by Contrail. The TSR-2 first flew in September 1964 and
was intended to replace the sub-sonic English Electric Canberra. However,
despite showing superb potential the project was cancelled less than a year
after the first flight.
I picked this model
up at the 2004 East Midlands Model Expo (UK). We had been looking around most of
the day, I had been looking for a TSR-2 for a while, and so far it had evaded me
but this was to be my lucky day. Earlier that day I had purchased the 1/72
Heritage TSR-2; then I found my main prize - the superb 1/48 Dynavector TSR-2.
At the end of the day we were making our way to the exit when my son James, who
likes to have a look under the display tables at the models for sale, said
“dad, that box says TSR-2 on it”, “where?” I said.
Under the table was
a old brown box that had been forgotten, the legendary words TSR-2 were printed
on the side on a strange salmon coloured label and a very flaky price tag was
attached - £2.50gbp. After purchasing the last 2 TSR-2’s, both at around £50gbp
I thought that there must be some mistake – but no! £2.50 it was. So Thanks
to James ‘Eagle Eye’ Branson, I had my third model of this superb aircraft
at a bargain price.
|
Click on
images below to see larger images
|
|

|
 |

|
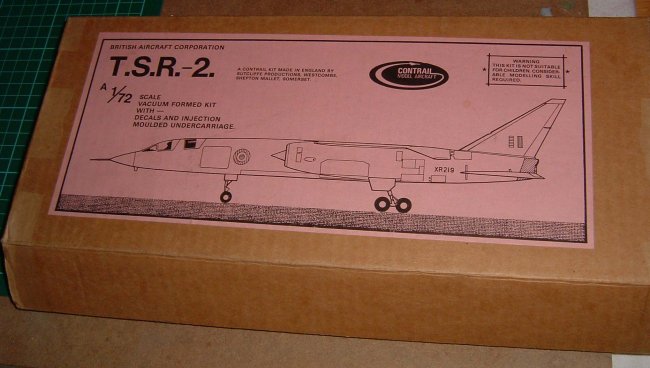
When
you open the box, you are presented with very basic vac form fuselage and wing
sections and some internal parts. You also get a very basic injection moulded
undercarriage and a PVC canopy. There are no openings in the fuselage and only
rudimentary markings to show you where the cockpit, bomb bay and undercarriage
doors should be. You are provided with some quite nice drawings of the TSR-2
done in 1/72 scale and on the reverse you get some b/w photos of the aircraft.
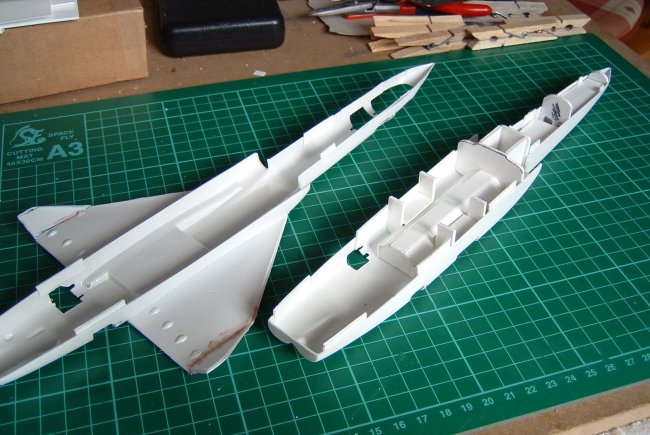
After
detaching all of the parts from the vac form sheet and doing the usual hours of
sanding and shaping to get them to align properly, I used the drawing to
determine where all of the openings should be and I carefully cut them open with
a sharp knife. I didn’t use the supplied internals as I wanted to add a bomb
bay so everything inside was made from scratch using thick styrene sheet; bomb
bay, gear bays and engine intakes were built up. There is also no cockpit
supplied with the model whatsoever, so I had to scratch build this also, I used
sheet styrene to build up the cockpit tub and instrument panels and some rod for
the joystick. I borrowed two ejection seats from a 1/72 Tornado and altered them
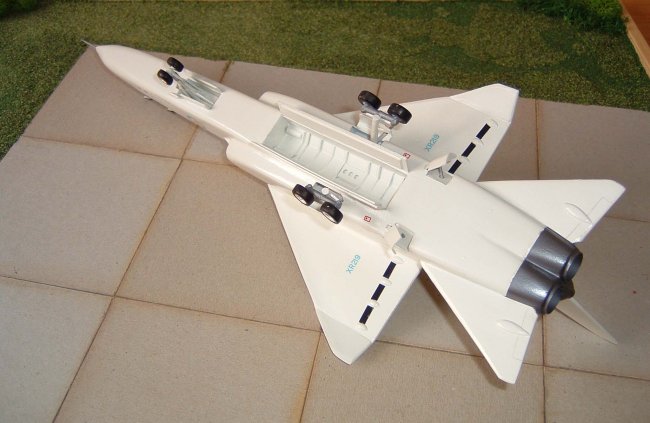
to make them look like TSR-2 originals. As for the rear of the aircraft, the
supplied after burner cans resembled nothing like the business end of a Bristol-Siddely
Olympus, so I substituted two short lengths of brass tube, I cut out the
compressor detail from the kit engines and installed it on to the inside of the
tube, you can’t really see it but its there. The wings and tail required some
severe shaping on the leading and trailing edges to give them a decent shape.
This was done using a Dremel and a rotary sanding bit, they were assembled using
EMA plastic weld and CA in the stubborn bits. The nose also required a bit of
reshaping as the angle was not quite right.
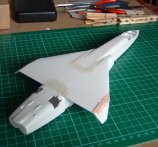
When
the internal detailing was completed, next was the task of putting the sub
assemblies together. I didn’t think that it would be a tail sitter but I still
placed as much lead shot and epoxy resin in the nose as would fit. I made up
some tabs and fitted them to the inside of the fuselage, and, after lots of dry
runs, glued them together. Next up was the wings and tail section. The wing was
difficult to attach as it did not match the upper fuselage shape at all, so some
reworking was required using the Dremel. Lots of filling and sanding was now
required to get everything to look right, this took days and days – I thought
it would never be done!
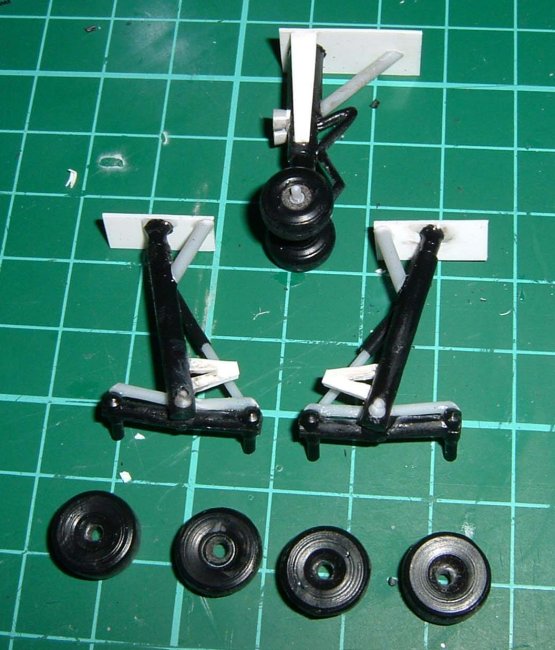
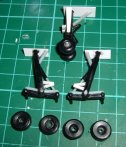
The
last parts to be built were the landing gear. The gear that is supplied with the
kit has almost no detail at all; it’s also the wrong shape. I used the basic
struts as a starting point and scratch built the rest of it.
Every
thing was now given a coat of Halfords auto white primer.
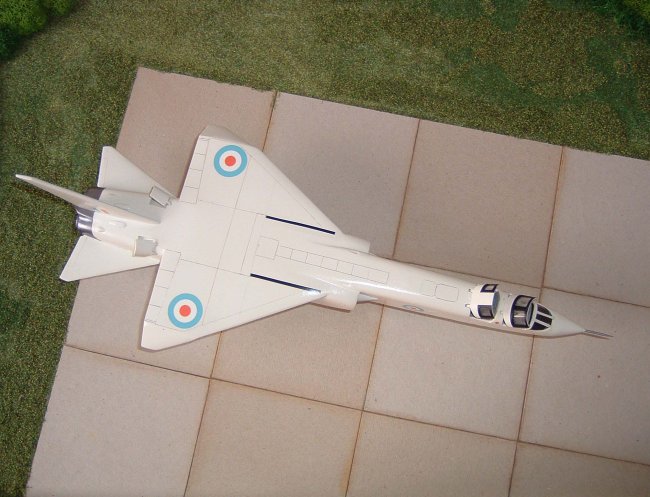
For
an authentic TSR-2 there is only one colour that will do – White. This is one
of a number of colours that strikes fear in to me (along with Silver). My main
concern with white is if the paint that I use will go yellow. So for a number of
years now I have been using auto spray paint, I use Halfords Ford Diamond white,
it covers very well and does not discolour even after years; it’s also
compatible with other Humbrol paints for detailing. The rear of the model was
masked off and I airbrushed Humbrol #27003 buffable steel around the engine
afterburners. The cockpit was done in grey and then the seats were added after
painting. There were no panel lines on any of the parts, so I used the detailed
drawings to mark some up on the fuselage and wings. I used a straight edge I
made from cardboard (this will flex around the shapes of the fuselage and wing)
and scored lightly through the paint. I went over the panel lines with a light
pencil to make them stand out. Lastly, the cockpit windows were added (this was
made more fun due to the fact that I managed to break the canopy frame and had
to scratch build another one) and then the landing gear was installed.
A
basic set decals is supplied - pale RAF roundels and markings for XR219 and
XR220. I also used some of the stencil markings for ejection warning and such
from the Tornado kit that had donated the ejection seats.
|
Click on
images below to see larger images
|
|
|

|
|
I
have really enjoyed building this model, it’s the first vac kit that I have
built for years, I thought that I would do this one before I move on to the
expensive Dynavector kit’s that I have now purchased. This model turned out to
be mostly scratch built, but fortunately I enjoy building parts myself. Whilst
scavenging through the Tornado model, I would sometimes find myself looking at
the instrument panels and landing gear thinking ‘wow – look, the details
already moulded in to this part!’ a standard injection kit will seem almost
too easy to build after this! One thing that made me smile is the warning on the
box “Not suitable for children – considerable modelling skills required”
– I’ll second that!
I
hope you enjoy my model.
Karl
|
Click on
images below to see larger images
|
|

|
|
|