|
The Canadair CL-41 Tutor was
designed in the late 1950’s as a primary jet trainer and light attack
aircraft, and became one of several indigenous Canadian designs to serve with
the Royal Canadian Air Force. The Tutor, designated CT-114 by the RCAF, entered
service in the early 1960’s and served until the dawn of the 21st
century as the RCAF/CAF’s primary trainer aircraft with the 2nd
Flying Training School (the Big 2), preparing many pilots to fly the CF-5
Freedom Fighter, CF-100 Canuck, CF-101 Voodoo, and CF-18 Hornet. Of course, the
Tutor still flies for the Snowbirds demonstration team, which I got to see for
the first time earlier this year when they and I ended up in Galveston, Texas on
the same weekend (another family trip), and the Tutor also flies for the AETE,
the Canadian Air Force’s aircraft testing establishment.
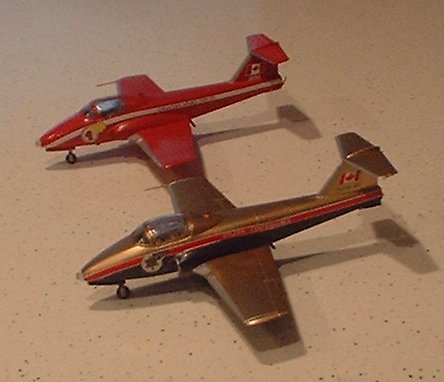
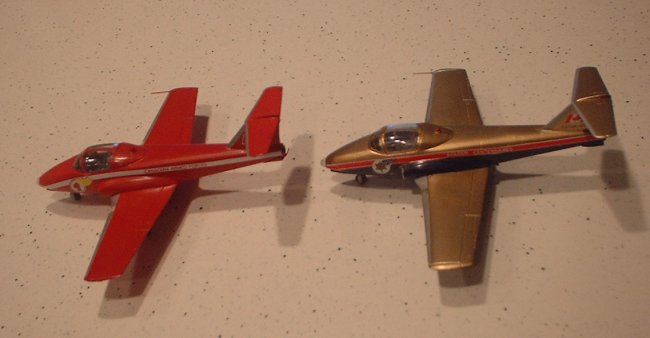
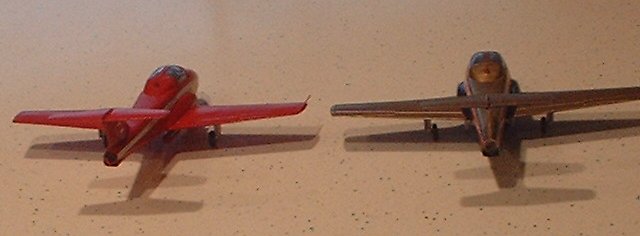
In 1967, Canada celebrated the
100th anniversary of its founding. As part of the celebration, the
RCAF formed a team of nine Tutors that would be designated the “Golden
Centennaires”. This team would fly 100 displays and then be disbanded
(actually the Centennaires got to fly 108 displays, including a few in the
United States), and was the precursor to the famous Snowbirds. The Centennaires
were known for their pale gold over dark blue scheme and their routines.
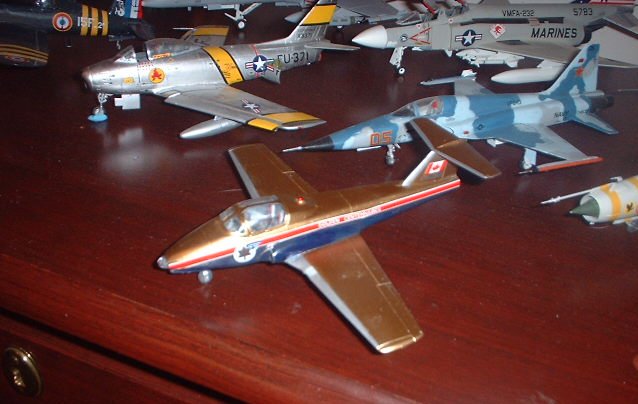
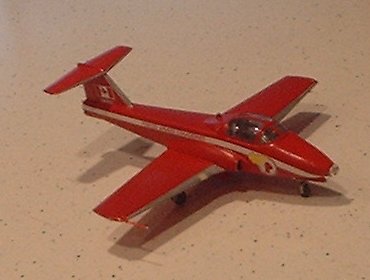
During the 1968-69 time frame,
two of the Centennaires’ Tutors were repainted into the “Red Knight”
colors to replace that team‘s T-33‘s. The Red Knight was a solo
demonstration act that flew to many smaller air shows that could not support a
larger team like the Centennaires, and the Red Knight always operated on a
shoestring budget relative to other air force aerobatic teams. In fact, one
interesting story related to me (thanks Colin K!) was that a Red Knight pilot
had to pay for 660 bucks worth of red acrylic paint at a Winnipeg store to
repaint the Tutors due to the fact there was no money in the air base’s budget
for painting. And this 660 dollars was a month’s pay. Tragically, a crash in
1969 ended the Red Knight. A Red Knight type solo demonstration team would be a
great thing to bring back for airshow goers like myself in North America.
| This is the
cockpit for the Golden Centennaires jet. The Red Knight cockpit was
identical. |
|
THE MODEL
Last year, I got a Hobbycraft
1/72nd scale Tutor kit from Uncle Bill’s Hobby mailed to Salt Lake
because I’d intended to do a Snowbird aircraft, and I still do. But during my
trip to the Canadian Maritime provinces (family cruise) a couple of months ago,
“Cheetah” Arsenault and I took a trip to the Train Trax hobby shop near
Saint John, New Brunswick. I rummaged through their decal offerings and found a
couple of interesting sheets from Arrow Graphics, one of which was the Golden
Centennaires Tutor, which I had wanted to build ever since I first saw pictures
of that aircraft (thanks Cheetah!). I ended up buying a boatload of Canadian
decals and taking them home.
Fast forward to late November.
The Rocky Mountain Modeling Club of Calgary, Alberta started an RCAF/CAF group
build. I’m a sucker for group builds and I’m game for building just about
anything. So I pondered what Canadian subject to build and got started on the GC
Tutor one night. Right away I noticed that the cockpit (as well as the kit
itself) was incredibly basic and lacked detail. And so much of the cockpit is
visible through the canopy, so I asked about a resin replacement, and alas there
was none. So after getting some photos kindly sent to me by Colin K, as well as
looking at the ARC walkarounds, I was ready to scratch build some detail. After
spray painting the ‘pit medium gray (Tamiya haze gray) and painting the
cushions on the seats red, I used Tamiya tape to simulate seatbelts and
harnesses, painted with light ghost gray, but with olive drab attachments to the
side of the seats. I also dry brushed flat black to highlight raised detail on
the instrument panel and used a Sharpie pen to fill out the instrument dials,
and I used Tamiya tape painted light ghost gray to simulate the cockpit side
lining, scoring the tape with a hobby knife to simulate the lining pattern.
Finally, I cut out a pair of extensions from Evergreen styrene and glued them to
the bottom left sides of the seats, then created an ejection handle for these
extensions out of thin Evergreen rod, and painted the handle the standard yellow
with black stripes. I finished the cockpit and was all set to glue it into the
fuselage….then I noticed a major problem. The instrument panel sat much too
high in the ‘pit and would have obscured most of the windshield. I wasn’t
quite sure what to do, but I ended up cutting off the rudder pedals to shorten
the instrument panel assembly. I glued the instrument panel flush with the very
front of the kit cockpit opening but I realize now that is the wrong location
and there should be a small coaming between the front of the opening and the
instrument panel. Ah well. I glued the cockpit in and noticed a major gap on the
right side of the aft wall between the bulkhead and the outer fuselage….so out
came the putty!
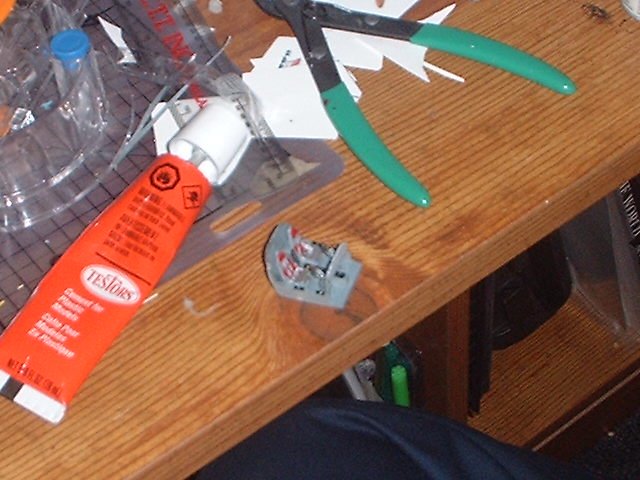
I was now ready to glue the
fuselage halves together, and I did, but the halves did not fit well at all, and
using Ambroid Pro Weld didn‘t close the seam. The wing (molded as one piece)
fit all right at the root but poorly on the bottom fuselage. I ended up using a
lot of Tamiya putty and doing a lot of sanding to make the bird look reasonably
seamless. I tried to sand the surface smooth for the upcoming Alclad finish and
for the most part I succeeded in removing the most obvious scratches. Finally, I
scratched some trenches on the nose area right under the windshield to simulate
the vents that are shown in the instructions but not molded into the kit!
|
Click on
images below to see larger images
|
 |
 |
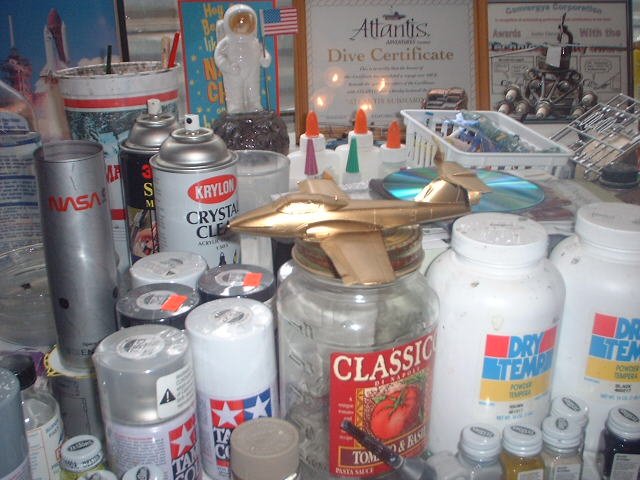
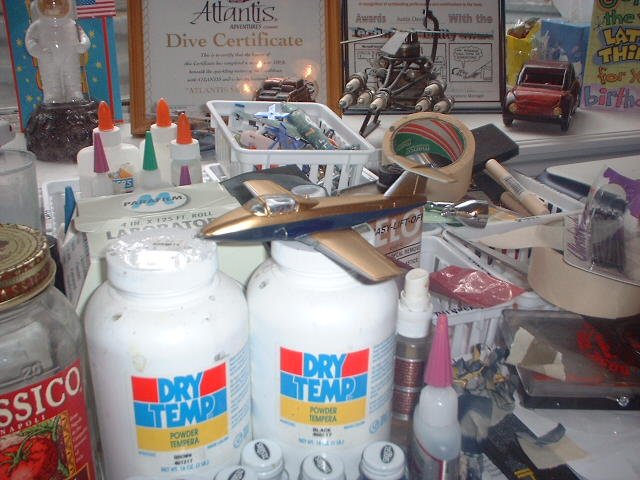
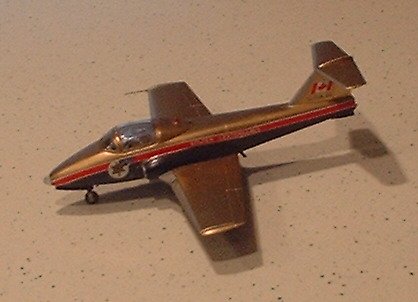
THE PAINT JOB
When the wings and horizontal
tail were dry, and the canopy firmly secured with clear parts cement, I used
Parafilm to mask the Tutor’s canopy, then sprayed the whole aircraft haze
gray, so that the canopy frames would be the interior color if viewed from
inside the cockpit. Then I sprayed the whole craft Tamiya Bare Metal Silver and
masked off the wing, stabilizer, and tail leading edges. After a day of drying,
I broke out the Alclad Pale Gold and it sprayed onto the Tutor like a charm. At
this point I was very happy. Then I noticed another problem. I had cut down and
sanded the kit nose strakes (much too thick!) and glued them on….only to
discover that the GC bird didn’t have them. So I cut them off and sanded down
the nose until it was smooth again. (The strakes were added to the Tutor later
because the bird was too stable without them and would not spin, the strakes
enabled spinning training.)
I masked the gold top and
airbrushed MM Acryl Blue Angel Blue for the bottom. Everything looked good when
I unmasked the bird, except that a slight overspray had gotten onto the vertical
tail, and the canopy framing looked jagged, edges not crisp. I resolved to leave
the horizontal tail off on the next Tutor until after decaling, and I touched up
the canopy frames and tail with MM Acryl Gold.
I also cut out the side decals
and measured the area where a gold circle was needed, then painted a gold circle
where the emblem would go. I got started with the decals, with the white
fuselage stripes first. I had not realized that the carrier film was present
throughout the whole sheet, and had not cut off enough of it when I put the
decal on, therefore I was forced to touch up “filmy” areas with Future and
Blue Angel Blue. The decal also didn’t adhere too well to curves, but I
finally wrestled it into a semi-acceptable state. Finally I got all the decals
onto the bird, then it was time to finish the bird. Thanks to info from Sean
Bratton and other Canucks on ARC, I learned that the Hobbycraft kit’s landing
gear is much too long, so I used my handy Tamiya sprue clippers to cut about 4-5
mm from the gear legs (I eyeballed it!), and used 20 second thick CA to glue the
gears onto the bird. I sprayed accelerator to cause the glue to dry once I was
satisfied with the gear placement and angle. I painted the wheel wells silver,
the tires scale black, used a silver Sharpie pen for the intake front lips, and
gunmetal for the jet pipe in the back. The top navigation light was painted
silver, then Tamiya clear red.
At this point I realized I’d
forgotten to include the aft smoke pipe and fitting, so I scratch built one out
of thin Evergreen styrene sheet and brushed Blue Angel Blue on it after gluing.
Evergreen rod was used to make the extension pointing upward to the horizontal
stabilizer. I also used that same styrene sheet and the sprue clippers to cut
out a couple of antennae, and used CA to glue them onto the bird. Finally, the
clear wing leading edge lights provided in the kit would not fit into their
slots, so I filled in the yawning notch with layers of clear parts cement
applied over a two day period. After the fuel tanks were glued on to the bottom,
the bird was done! I was fairly satisfied, but the build and the research had
left me wanting to build another Tutor…….
THE RED KNIGHT
The more I looked at my Red
Knight decal sheet, the more I was intrigued. I looked up some more info on that
bird, and suddenly I was ready to start. I’d learned a few lessons from the
first bird that made the Red Knight construction go more smoothly. For starters,
I cut off the locating pins in the fuselage halves. This enabled me to bond the
fuselage halves with a minimum of putty; the Ambroid Pro Weld worked a lot
better this time. The cockpit was done in the same manner as the GC bird, except
the instrument panel was moved a tiny bit back into a more proper location. (I
still had to cut off the rudder pedals). I also scratch built the smoke pipe
fairing and glued it onto the aft end of the Tutor, by the jet pipe, before I
started any painting. I glued on the wings and had to use a little putty on the
wing roots and a LOT of putty on the bottom as well as lots of sanding. I also
had to put putty on the nose and sand it; I got myself a Flexi-File and used it
to sand the nose to avoid “squaring” off round areas and it worked great.
Finally, I left off the strakes, the Red Knight didn’t have them either.
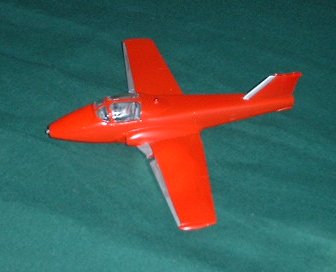
After finally being satisfied
with the sanding and polishing efforts, and masking the canopy with Tamiya tape
carefully cut, I sprayed the bird haze gray and then Bare Metal Silver. Then
came the toughest part of the build, namely, figuring out which shade of red to
use for the bird. I tried Tamiya Italian Red but it was too red, not orangish
enough. So I ended up airbrushing the bird with MM Acryl Italian Red, which has
a more orangish tint, and it turned out to be a perfect match. I sprayed several
thinner coats over a period of two hours and that left me with a finish I was
satisfied with. The decals came on, and they went on a lot better, probably
because I cut the decals from the sheet more closely to their outlines and used
warm water. Then came the landing gear, drop tanks, and horizontal stabilizer,
and the clear landing lights in the wing leading edge, done in the same manner
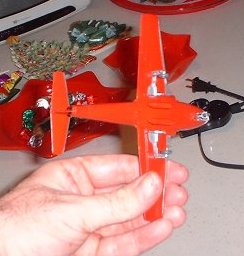
as the GC model, and I was done. My Tutors are missing a pitot tube on the right
wingtip which I’ll include later, I just noticed this today. The Red Knight
model looks cleaner and better to me than the Golden Centennaires bird I did
because of what I learned.
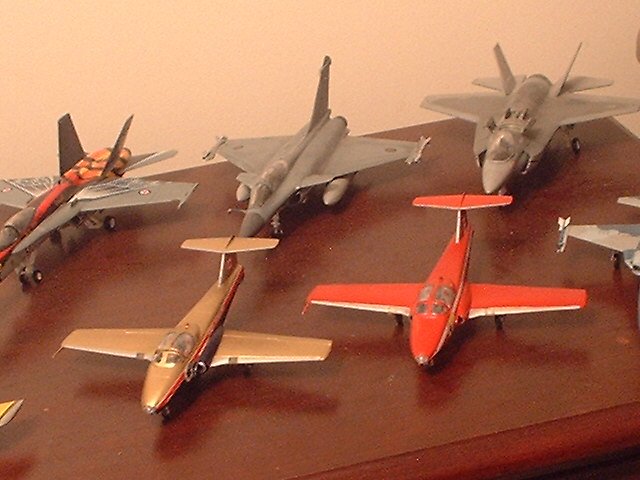
CONCLUSION
I had a lot of fun learning about
and building the Tutors, and more jet trainers are in my future, including more
Tutors as well as Tweety Birds, Talons, and Strikemasters. I’m planning to do
a Snowbirds Tutor in the near future, along with the Black Knight, the NATO 50th
anniversary bird, a regular CAF training bird, and the CL-41R radar trainer with
the needle nose.
Happy Modeling!
Justin
REFERENCES:
Many thanks to Colin Kunkel,
Charlie Arsenault, Sean Bratton, Tilt, Emil Varosi, and Barney Dunlevy for their
help and encouragement on this project.
|
|